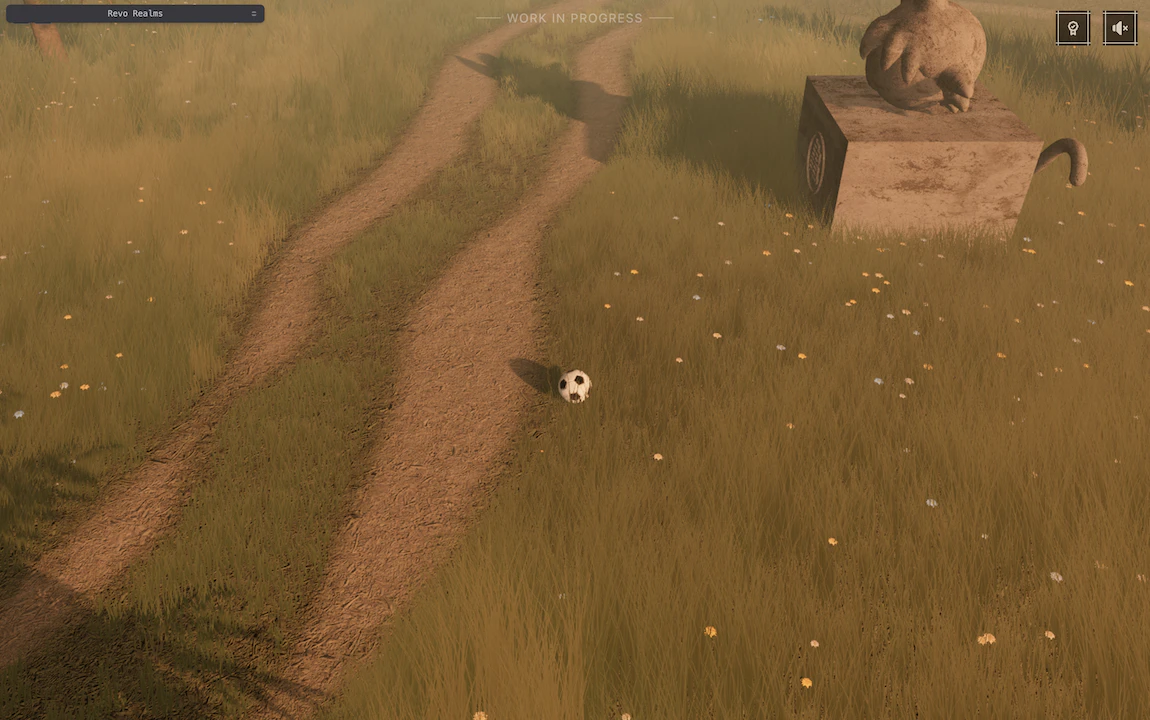
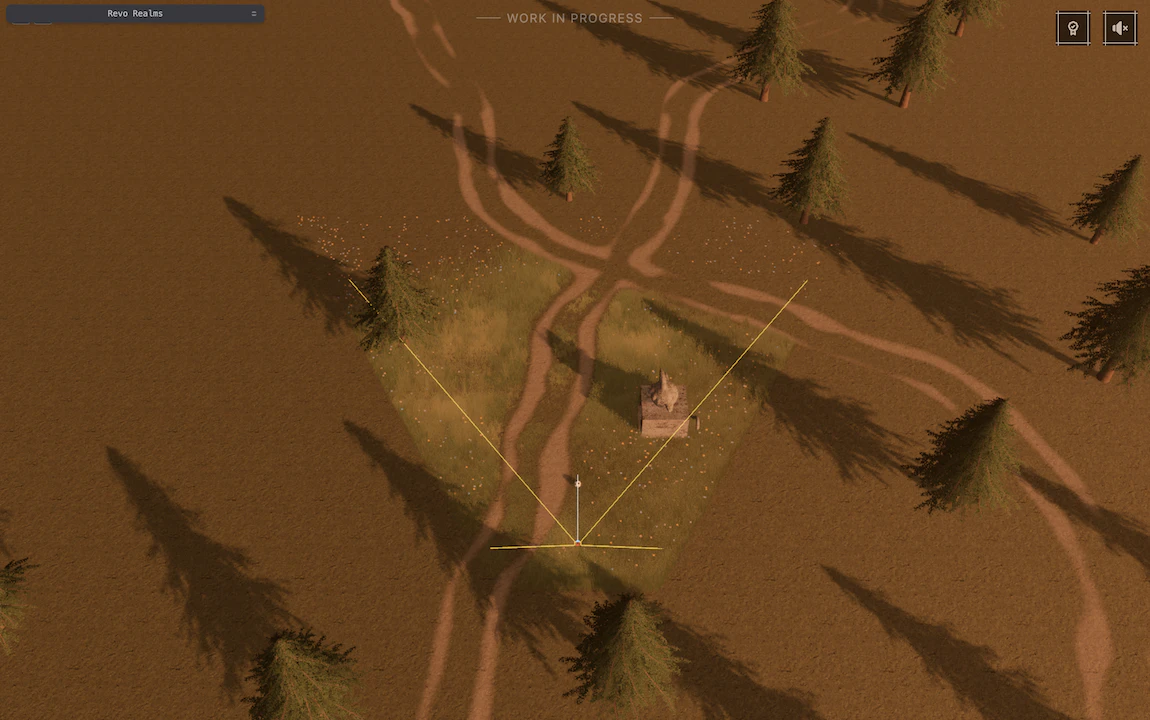
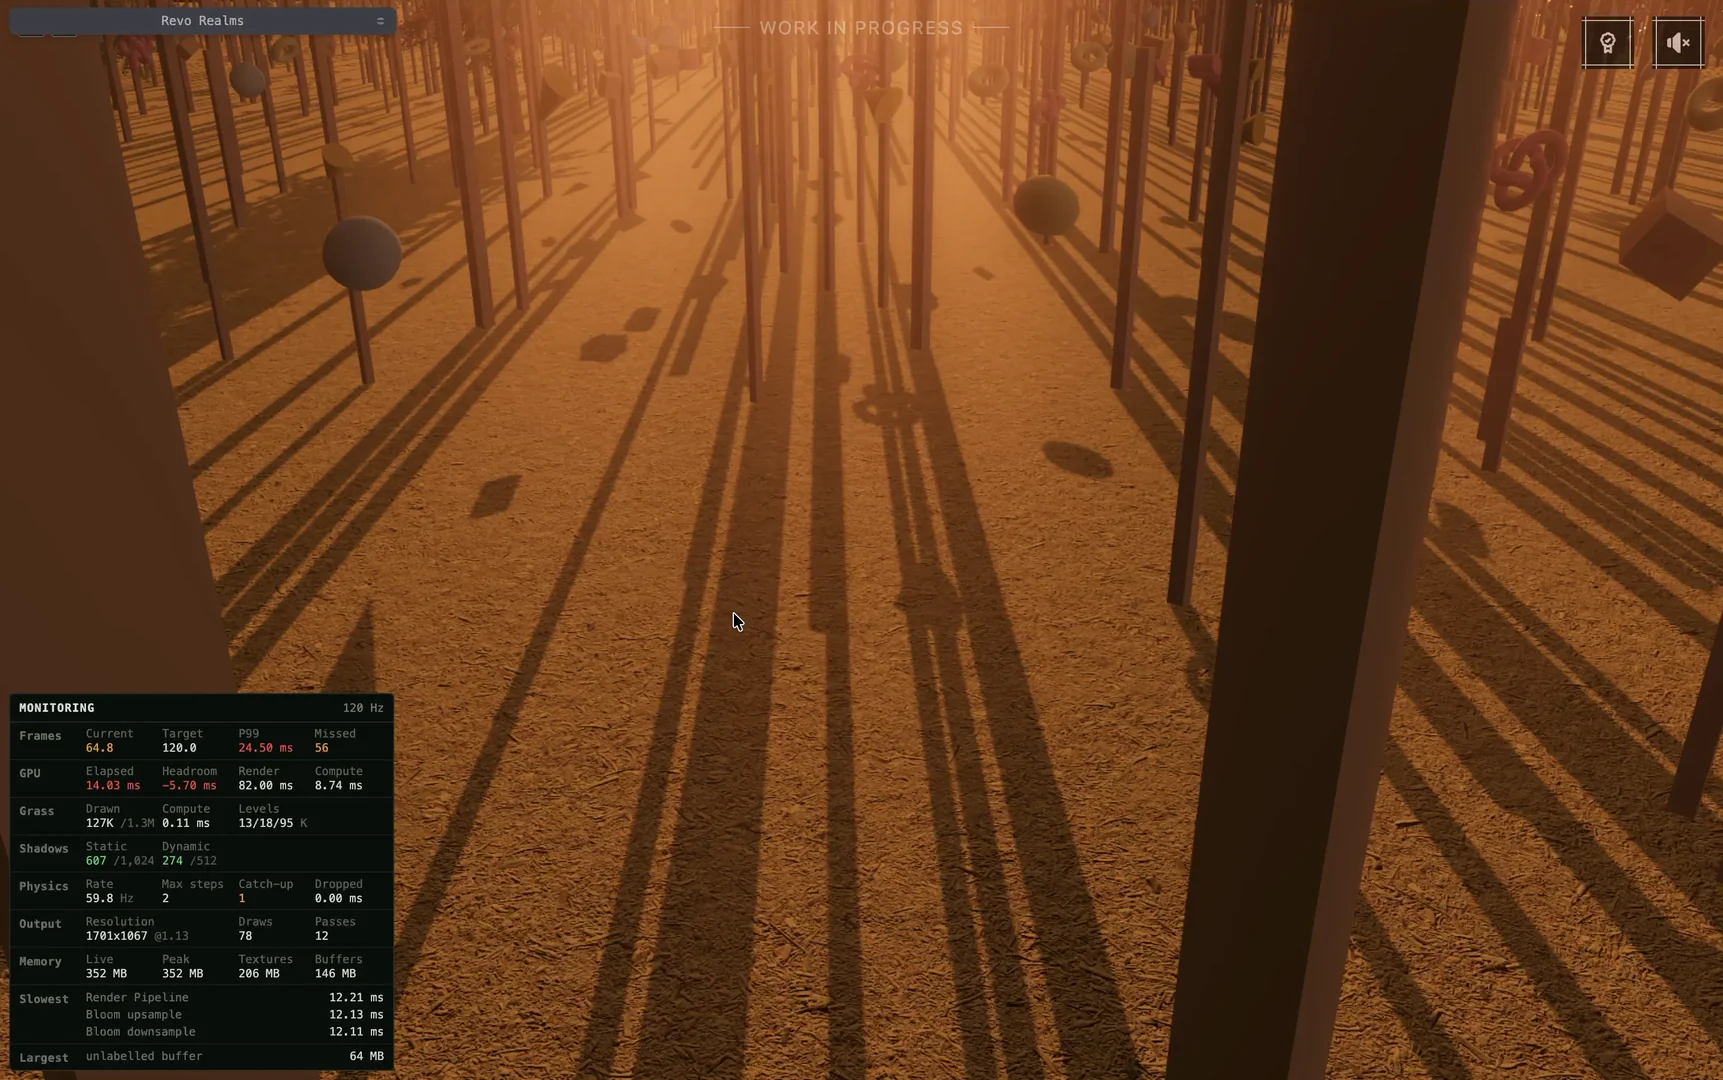
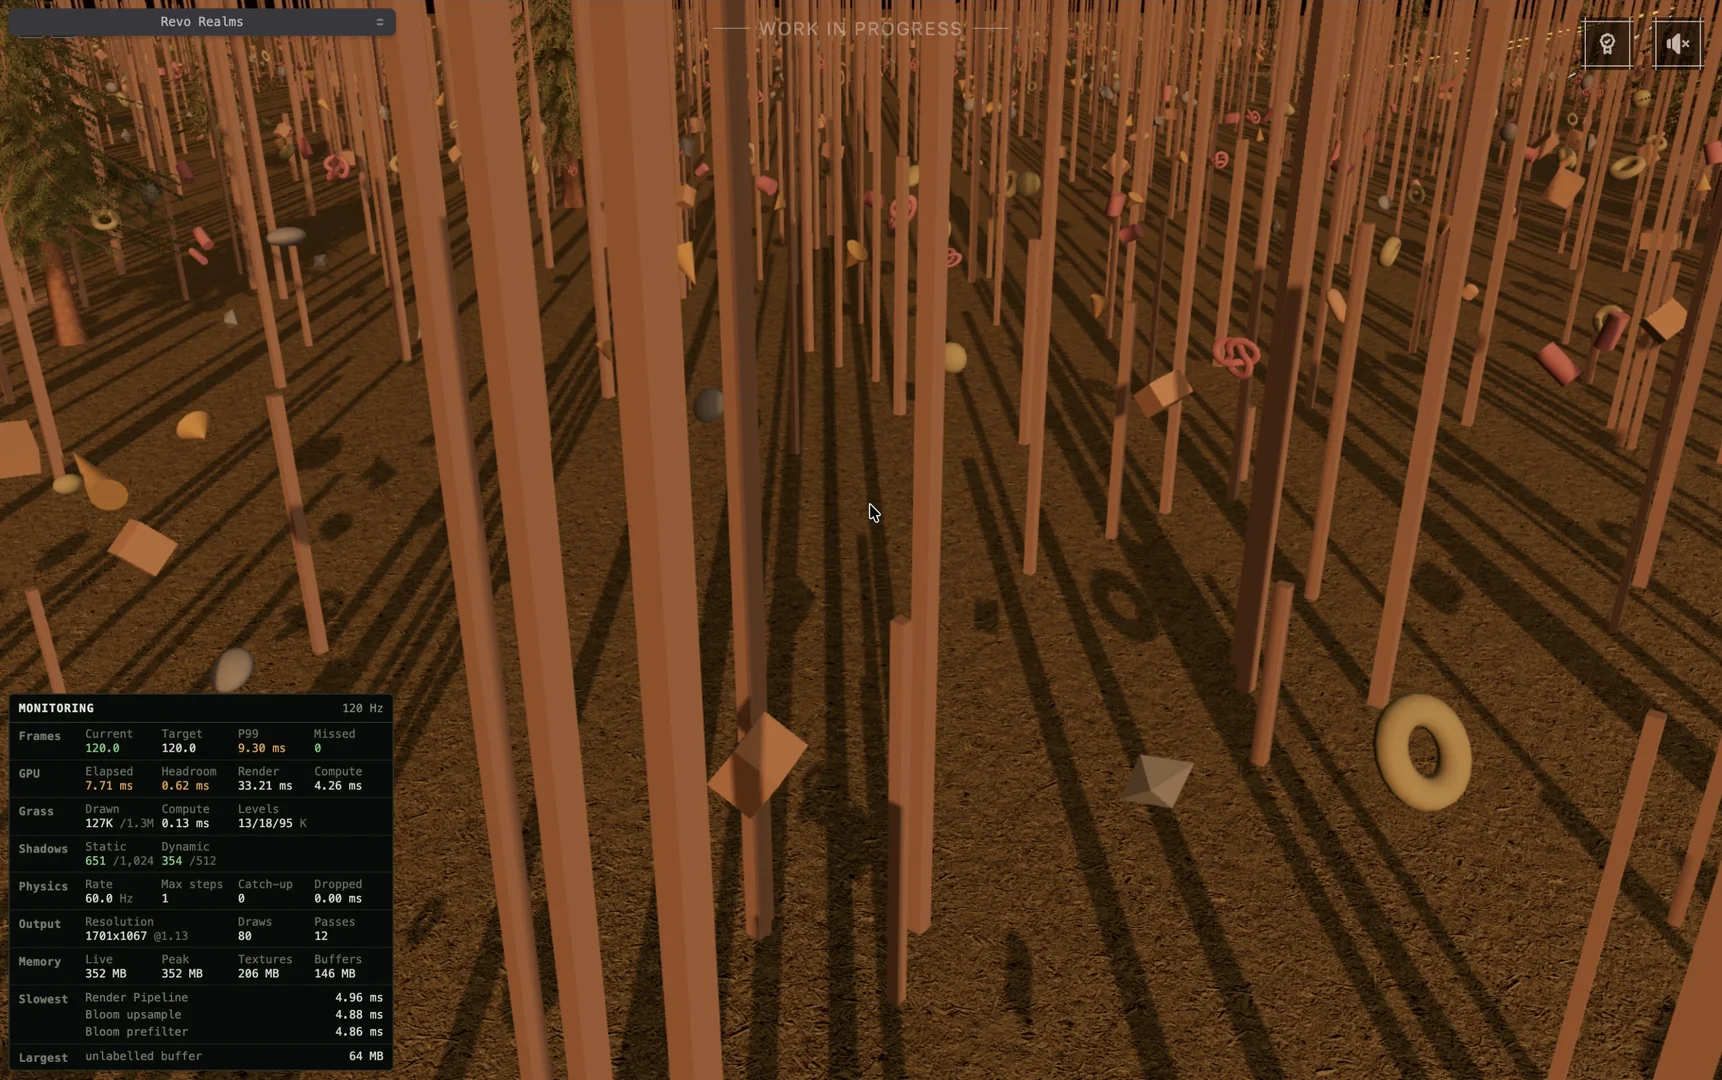
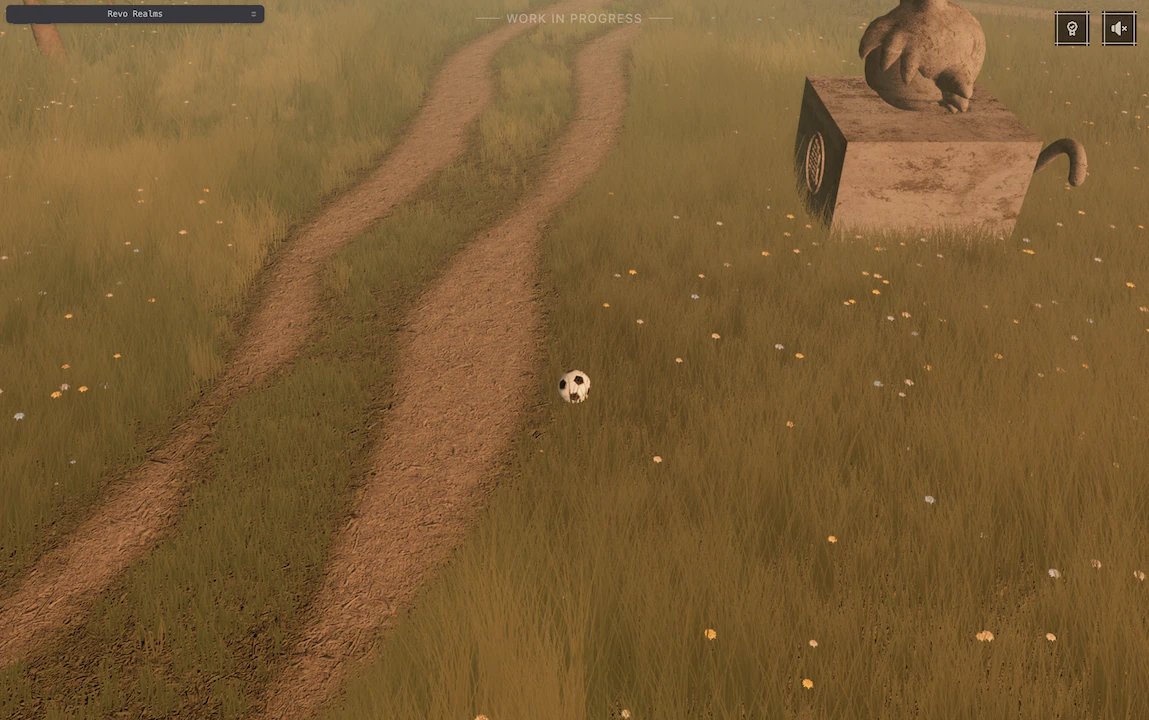
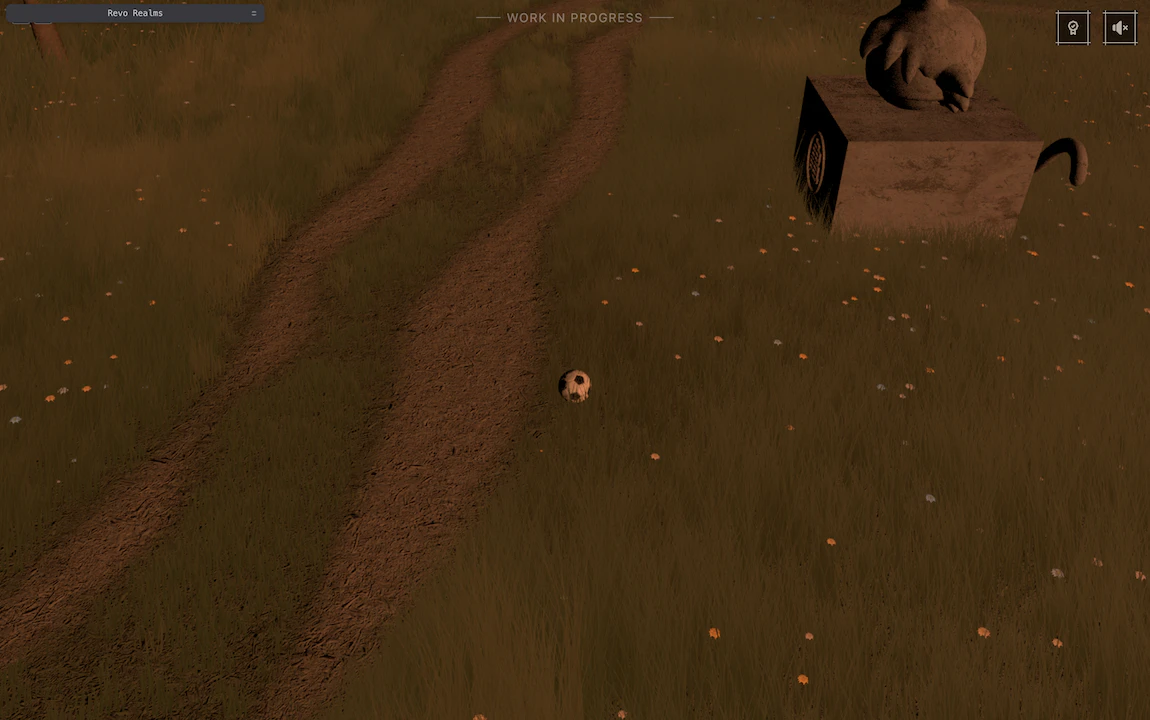
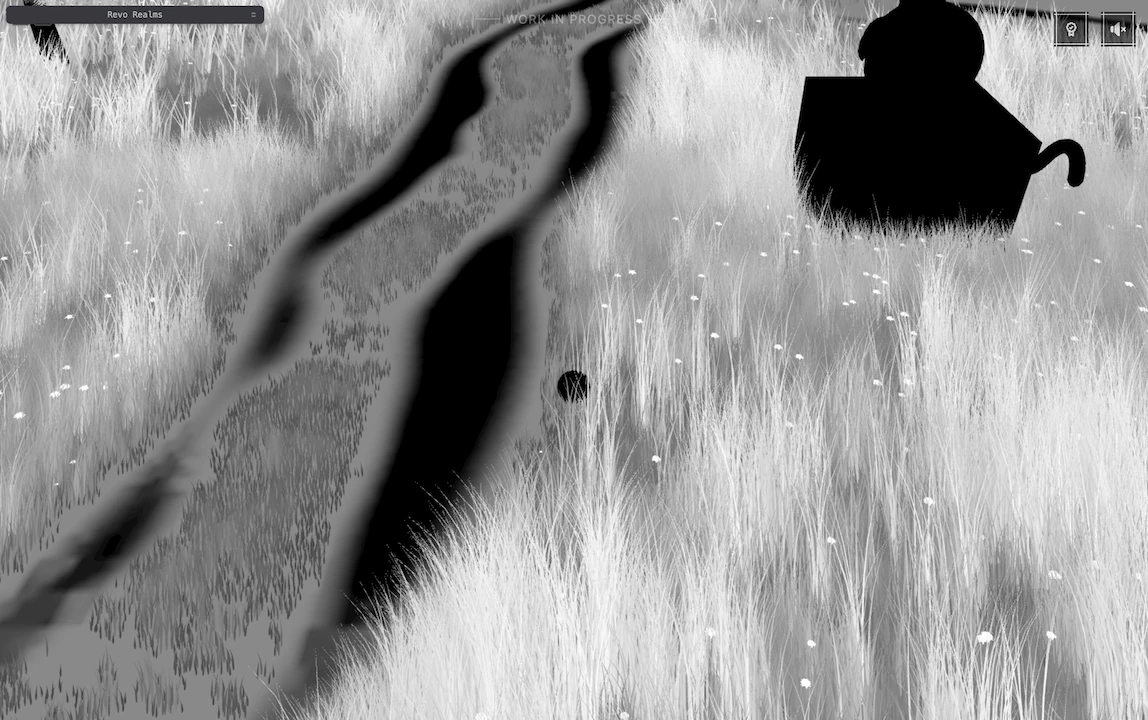
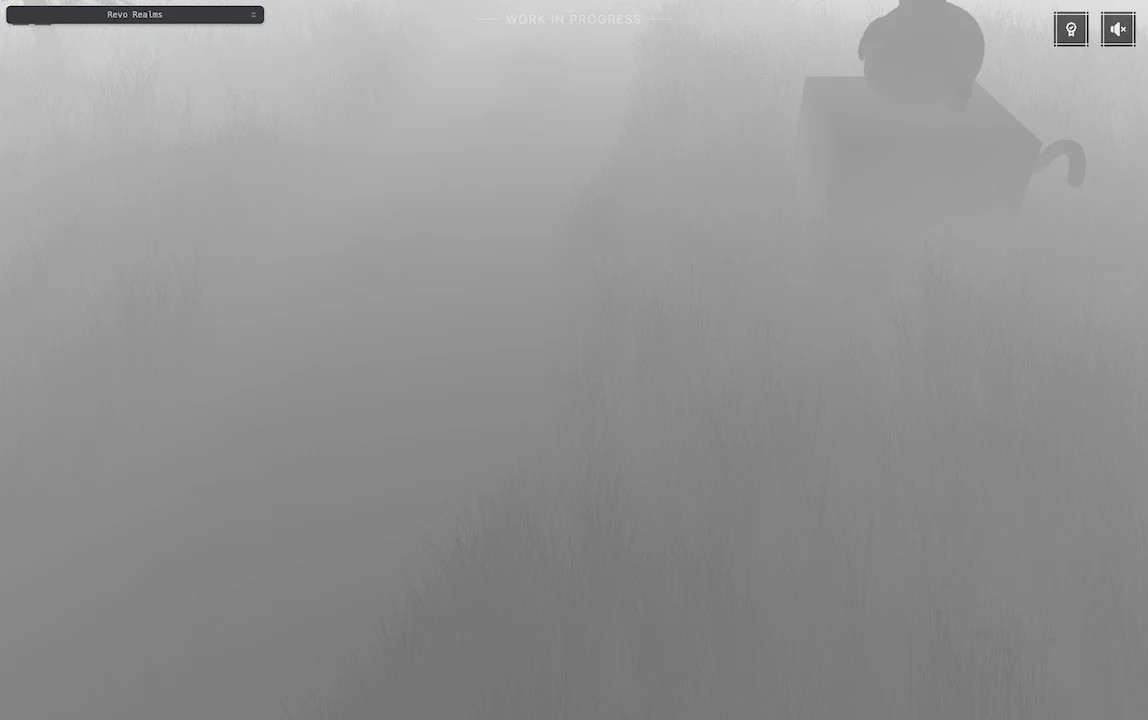
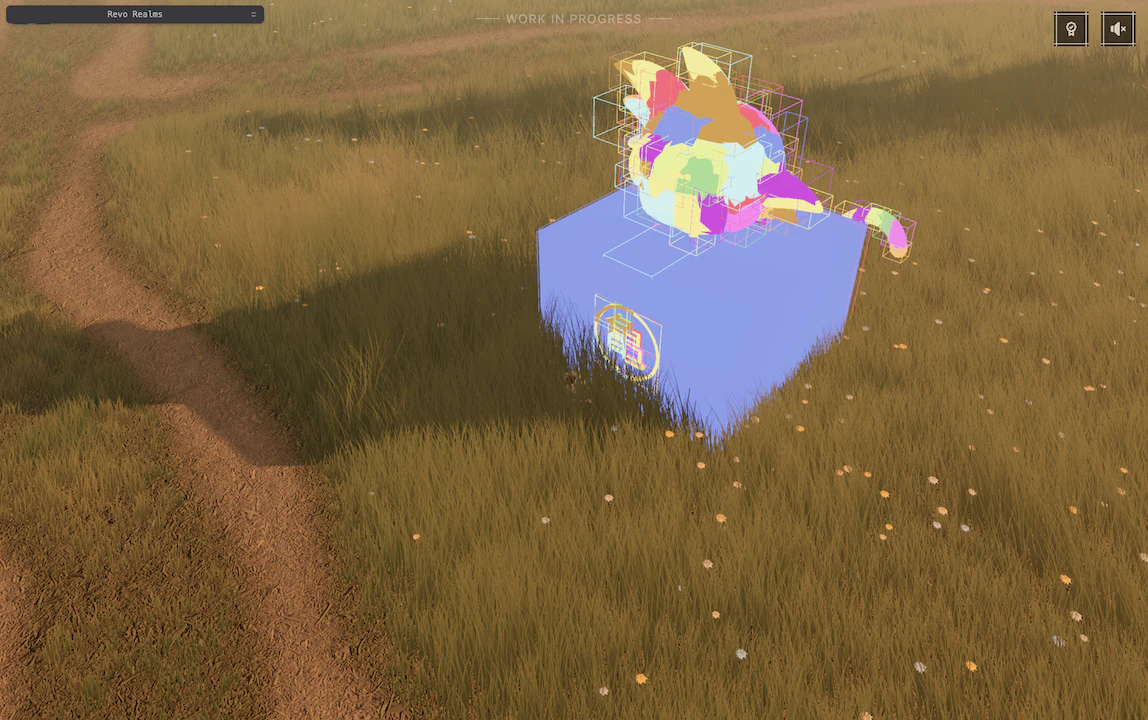
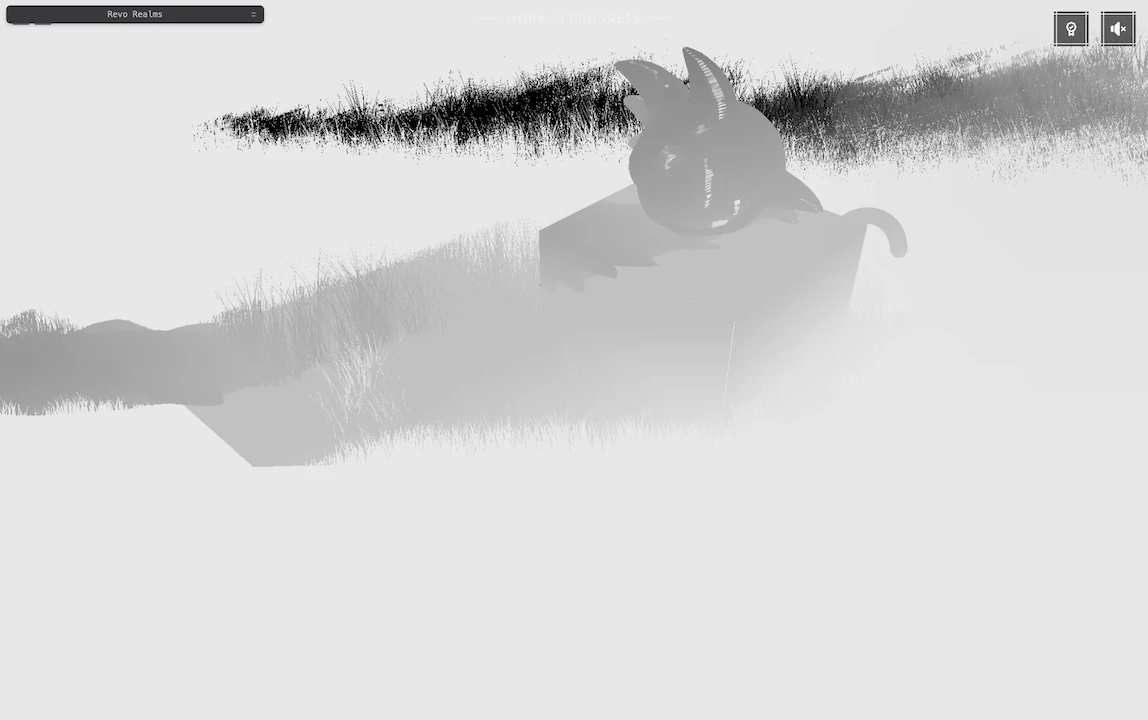
It’s been almost 2 years since I created the repo and started working on what has become my dearest project,
Revo.
Pretty much since it had more in it than just a rolling ball, changing the light’s color or position, or moving anything static
in the scene, meant going back to Blender to bake the shadows onto the terrain again.
Then export, pack with the other textures, compress everything to KTX2, load it back into the project and finally sample it in
each object’s shader to (incorrectly) darken its color…quite the circus.
And if an object had to shadow itself, like the Goku statue for example, it needed its own bake on its own texture and the
whole dance started again.
Eventually I wrote a few scripts to save some time on the packing and converting part, but even with those, the process was just
long enough that I found myself avoiding changes.
Lighting is such a big part of how a scene feels. I wanted to be able to play with it freely, so a couple of months ago I got
fed up and went down yet another rabbit hole, which led to this:
Kagemane no Jutsu
Before settling on baking, I had tried the built-in shadow map: a directional light, castShadow, receiveShadow and a shadow
camera following the player around. As the world got bigger and the camera could rotate freely, I kept losing quality or
paying way too much for it, so baked shadows crept in pretty early on.
I also remember giving cascaded shadow maps a try, but I never managed to get them working well, most likely a skill issue on my
end, so back to baking it was.
For a while, the player was the only thing with a real-time shadow and fairly recently I replaced even that with an analytical one
in post. It’s a sphere, after all, so the maths was fairly straightforward.
So I kept putting things off. Adding or moving something static meant another bake, and for anything that moved I still hadn’t
figured out what to do with its shadow.
This time I started by looking into how classic shadow maps actually work behind the scenes. I’d been using them since the
beginning, but my idea of what was inside that texture was…pretty far off.
From there I kept digging into the limits of each approach and how other techniques got around them. That took me through
cascades and eventually to virtual shadow maps, which I hadn’t even known about when I started.
All I wanted was to stop thinking about shadows every time I moved something in the scene. And here I am, yet again, trying to put
the journey into words :)
1. Classic shadow maps
In my head, a shadow map was a normal texture with shadows in it. Maybe not the best way to describe it though, I thought it was
something that somehow the scene sampled, and used that value to darken its colors. A bit like laying an image over the world
from above.
I hadn’t thought much further than that, and Three.js hadn’t really given me a reason to. Enable shadowMap on the renderer,
let the light cast shadows, set castShadow and receiveShadow on the right meshes, and there you go.
The shadow map is indeed a texture, yes, but what it actually holds is depth, seen from the light.
That was the first thing I had to get my head around. The texture records how far the light gets before hitting something, and
the scene uses that information to work out whether the light can reach each point we’re looking at.
Simplified quite a bit, the whole thing comes down to three steps:
Before the frame, render the casters from the light’s point of view, keeping only their depth. That texture is the
shadow map.
Render the scene from the main camera as usual.
During step 2, while each point works out its lighting, project it into the light’s view to find where it lands on the shadow
map and how far it is from the light (its z). If it’s farther than the stored depth, something got in the way and that light
doesn’t reach it, otherwise it’s lit.
The result only dims that one light’s contribution, not the whole color, which is also where my baked shadows went wrong.
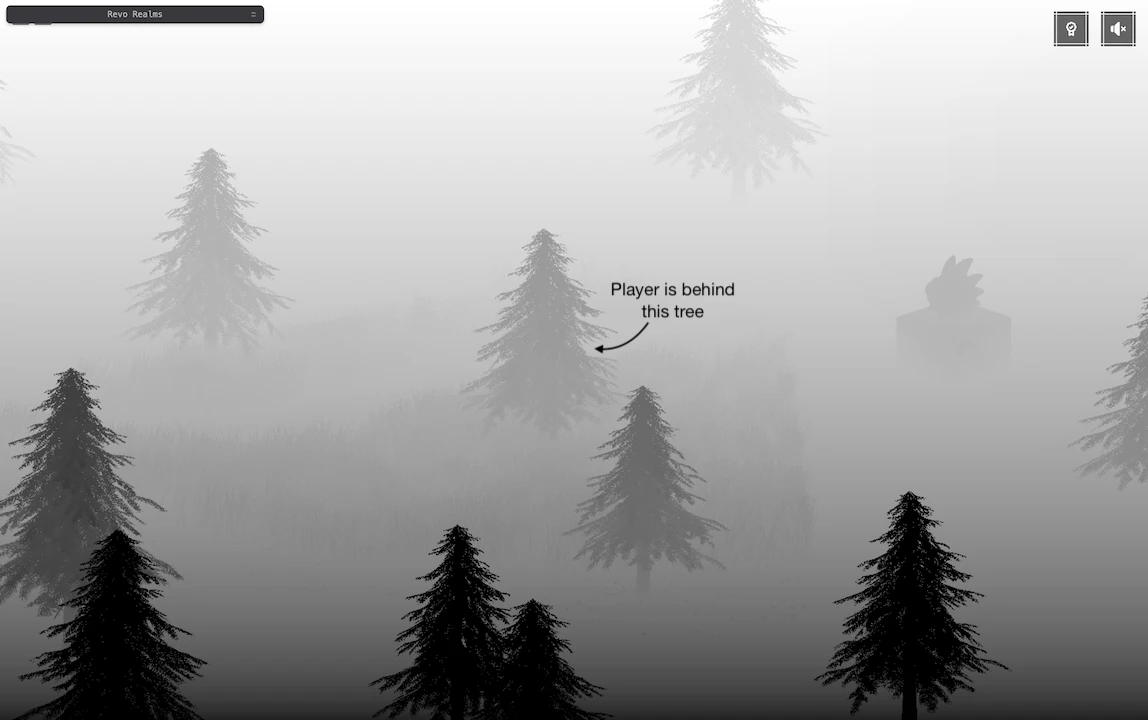
Putting the player under a tree in Revo made this easier for me to picture. Here’s the scene seen from the sun, keeping only
that depth:
Depth from the sun’s point of view, darker is closer to the sun
As the image shows, the player is nowhere to be seen because the canopy hides it completely, and the depth stored at that spot
belongs to the canopy.
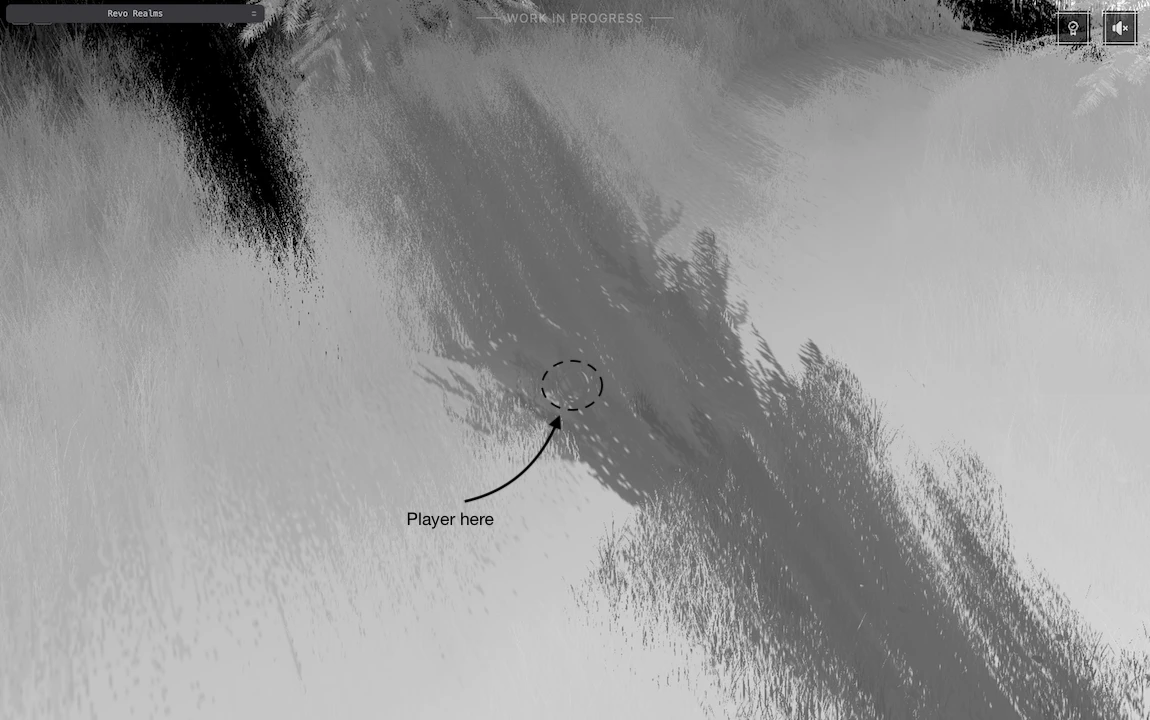
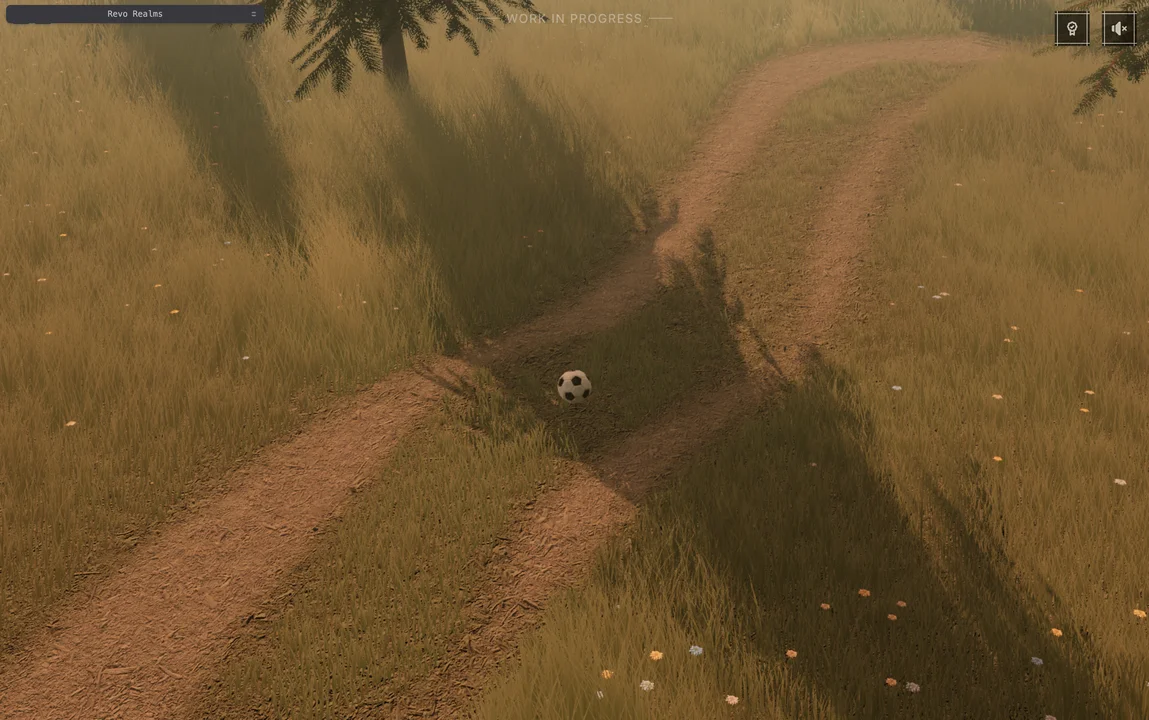
From the main camera, though, the player is visible. Each of its points gets projected into the sun’s view to read the depth
stored there. Below is that depth on the left, next to the final frame:
The sun’s depth map, projected onto the main camera’s view
The final frame
The tree’s shape appears over the player on the left because all those points read the canopy’s depth, which is closer to the
sun than they are. Something got in the way, so they’re in shadow.
Out on the path, the stored depth is the ground’s own, so the two values match and it stays lit.
The screenshots here come directly from Revo, which already uses virtual shadow maps. A classic map would give very similar
images, though, and the depth comparison works the same way.
Written in TSL, that comparison takes just a few lines. This is a simplified version of what the built-in Three.js shadows do
with an orthographic shadow camera:
The sun is so far away that its rays reach us practically parallel, so its shadow camera is orthographic. That’s also why there’s
no divide by w in the code: an orthographic projection always leaves it at 1. Other lights aren’t that simple, though. A spot
light renders its shadow through a perspective camera, which does need the divide, and a point light renders a cube map, one view
for each direction.
The bias in the last line gives the comparison a little tolerance. Without it, a surface can start shadowing itself.
Shadow acne and Peter Panning
With limited resolution and depth precision, a surface can end up just behind the depth stored for itself. The comparison
decides it’s in shadow, and ugly dark stripes appear across it: shadow acne. The bias gives it a little room, so the two
depths no longer have to match quite so closely.
Too much room, though, and the shadow starts detaching from the object. Even the ground right under its base passes the comparison
as lit, so the object looks like it’s floating. That’s Peter Panning, named after Peter Pan, whose shadow came loose and had
to be sewn back on :)
In the video below I slide the bias from one extreme to the other:
Depth bias from Peter Panning to shadow acne
These two phenomena sit at the two ends of the same dial, the bias, and the goal is to find a spot between them where neither
shows up.
Filtering techniques
Even with the bias set, a single comparison still gives a hard yes or no. That leaves a razor-sharp edge, and a blocky one once
the texels get big.
I wanted the tree shadows to soften as they spread across the ground, while keeping the contact with each object sharp.
Real lights have a size, which is where that softness comes from, but a basic shadow map knows nothing about it, so the softness
has to be faked somehow.
The filtering options started making more sense once I looked at what each one changed about that same comparison:
Basic → one comparison per pixel, so each pixel is either fully lit or fully in shadow. The cheapest option, but the
edges are sharp and get blocky when texels are big.
PCF (percentage-closer filtering) → compares a few texels around the pixel and averages the results, so the edge fades
from lit to shadow instead of snapping. The softness is the same everywhere, near the caster or far from it.
PCSS (percentage-closer soft shadows) → PCF with a variable filter size. It first checks how far the caster is from the surface
its shadow falls on, then uses a small filter when it’s close and a wider one when it’s far, so the shadow is sharp at the contact
point and softer further away.
VSM (variance shadow maps, same acronym as virtual shadow maps but unrelated) → stores the depth and the depth squared
in two channels, and blurs both. Blurring depth alone would only mix the canopy and the ground into a made-up depth in between,
but with both, each texel knows the average depth around it and how much it varies, which is enough for a pixel to estimate how
much of that area sits between it and the light. Soft edges come cheap, although light can leak where casters at very different
heights overlap.
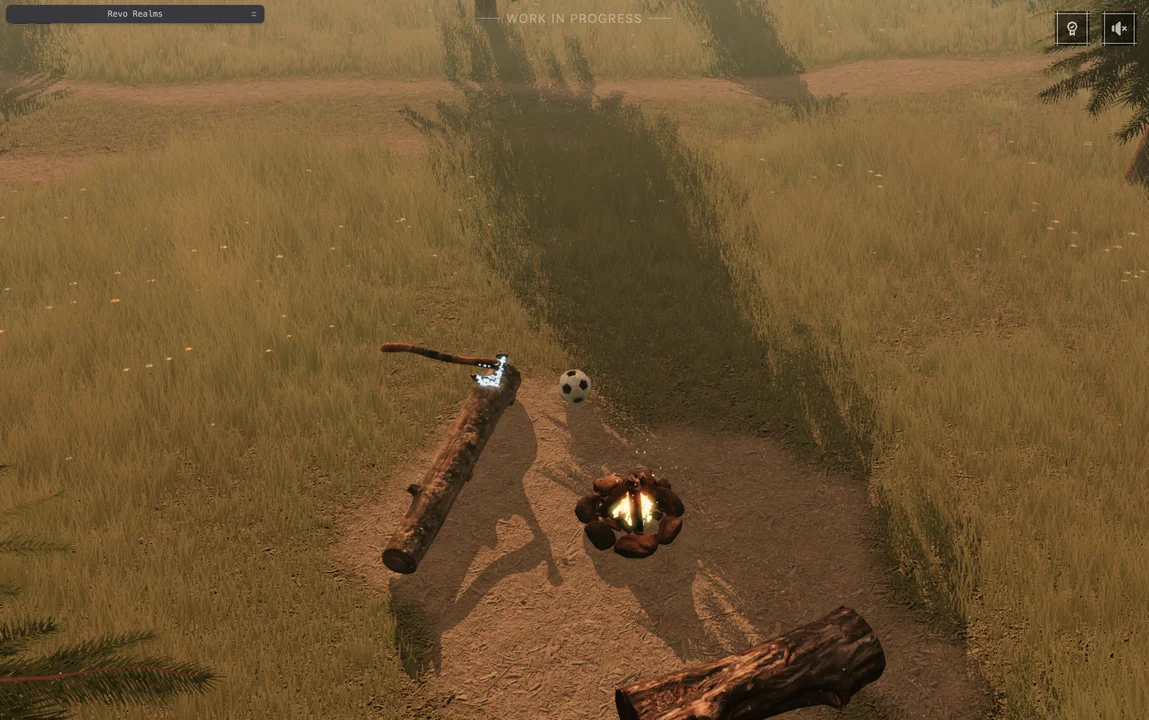
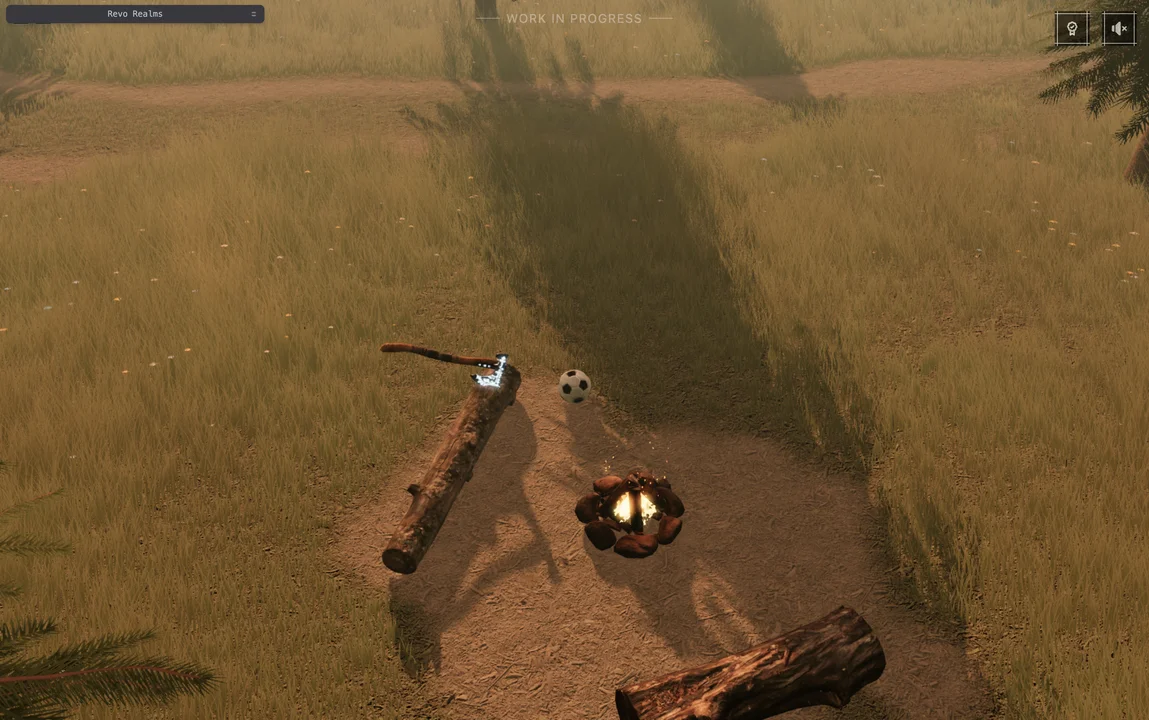
For Revo I went with PCSS, and the log with the axe is the best place to see what it changes:
One comparison per pixel, sharp edgesPCSS, sharp near the caster and softer further away
On the left, its shadow has the same sharp edge all the way along. On the right, PCSS keeps it sharp right next to the log and
lets it soften the further it spreads. There are no PCF or VSM shots, since Revo already runs PCSS and I didn’t want to rework it
just for a comparison, pardon :)
Size vs quality
Filtering only changes how the edges look, though. What actually made me give up on the built-in shadow map back then was how
much of the world a single map had to cover.
Revo’s camera sees 150 meters ahead and over 200 meters across at the far end. A 4096 map stretched over that gives each texel
around 6 centimeters of ground, fine for a distant tree but pretty blocky right under the player. I could keep the map tight
around the player, but then I’d completely lose the shadows further out.
A bigger texture gets expensive quickly. At 32 bits per texel, 4096 × 4096 is 64 MiB, and 8192 is already 256 MiB,
for a single light. Also, every time the map updates, the casters inside its camera have to be drawn into it again.
So for a while I used a hybrid approach: everything but the player was static, so it got baked, which let me shrink the
real-time map to a tiny 64 by 64 over just 2 by 2 meters around the player (yep, the ball is a whole meter across, it just
doesn’t look like it). That’s about 3 centimeters per texel for almost nothing, since all it had to hold was one ball.
It worked well, but only as long as nothing else moved. A new object or a different sun meant another bake, and anything else
that moved had no shadow at all.
On paper, cascaded shadow maps are the go-to answer for exactly this. But my curiosity, as usual, got the best of me, and I kept
digging past them…
2. Cascaded shadow maps
Cascades start from a pretty simple observation: not every part of the screen needs the same amount of detail.
Right in front of the camera, a single shadow texel can cover dozens of pixels, so it’d better be tiny. A hundred meters
away, that same texel shrinks to a pixel or less, and nobody would notice if it was ten times bigger.
So instead of one map stretched over everything, the view gets cut into a few slices by distance, and each slice gets its own map.
The first one covers just the few meters in front of the camera, the next one a bit more, and the last one everything far away,
all at the same resolution but with a very different amount of ground per texel.
It’s what the big public engines have been shipping for years. Unity calls them shadow cascades, Godot splits the view in four by
default, and Unreal still has them, even though virtual shadow maps have been the default for new projects since Unreal Engine 5.
Three.js ships one too, CSMShadowNode, and that’s the one I tried back then. It’s been more than a year though, and honestly I
don’t remember much about how it behaved in Revo, besides never getting it to work well, so what follows comes more from research
than from my own experience.
I still wanted it in here, since cascades are the step between a single shadow map and virtual shadow maps, and the picture
wouldn’t be complete without them. It’s also why this chapter comes without screenshots: Revo already runs on virtual shadow maps,
and I didn’t want to bend the project just to showcase cascades.
Picking the right cascade in the shader is the easy part: take the pixel’s depth from the camera, find the slice it falls in,
and run the same comparison from the previous chapter against that slice’s map.
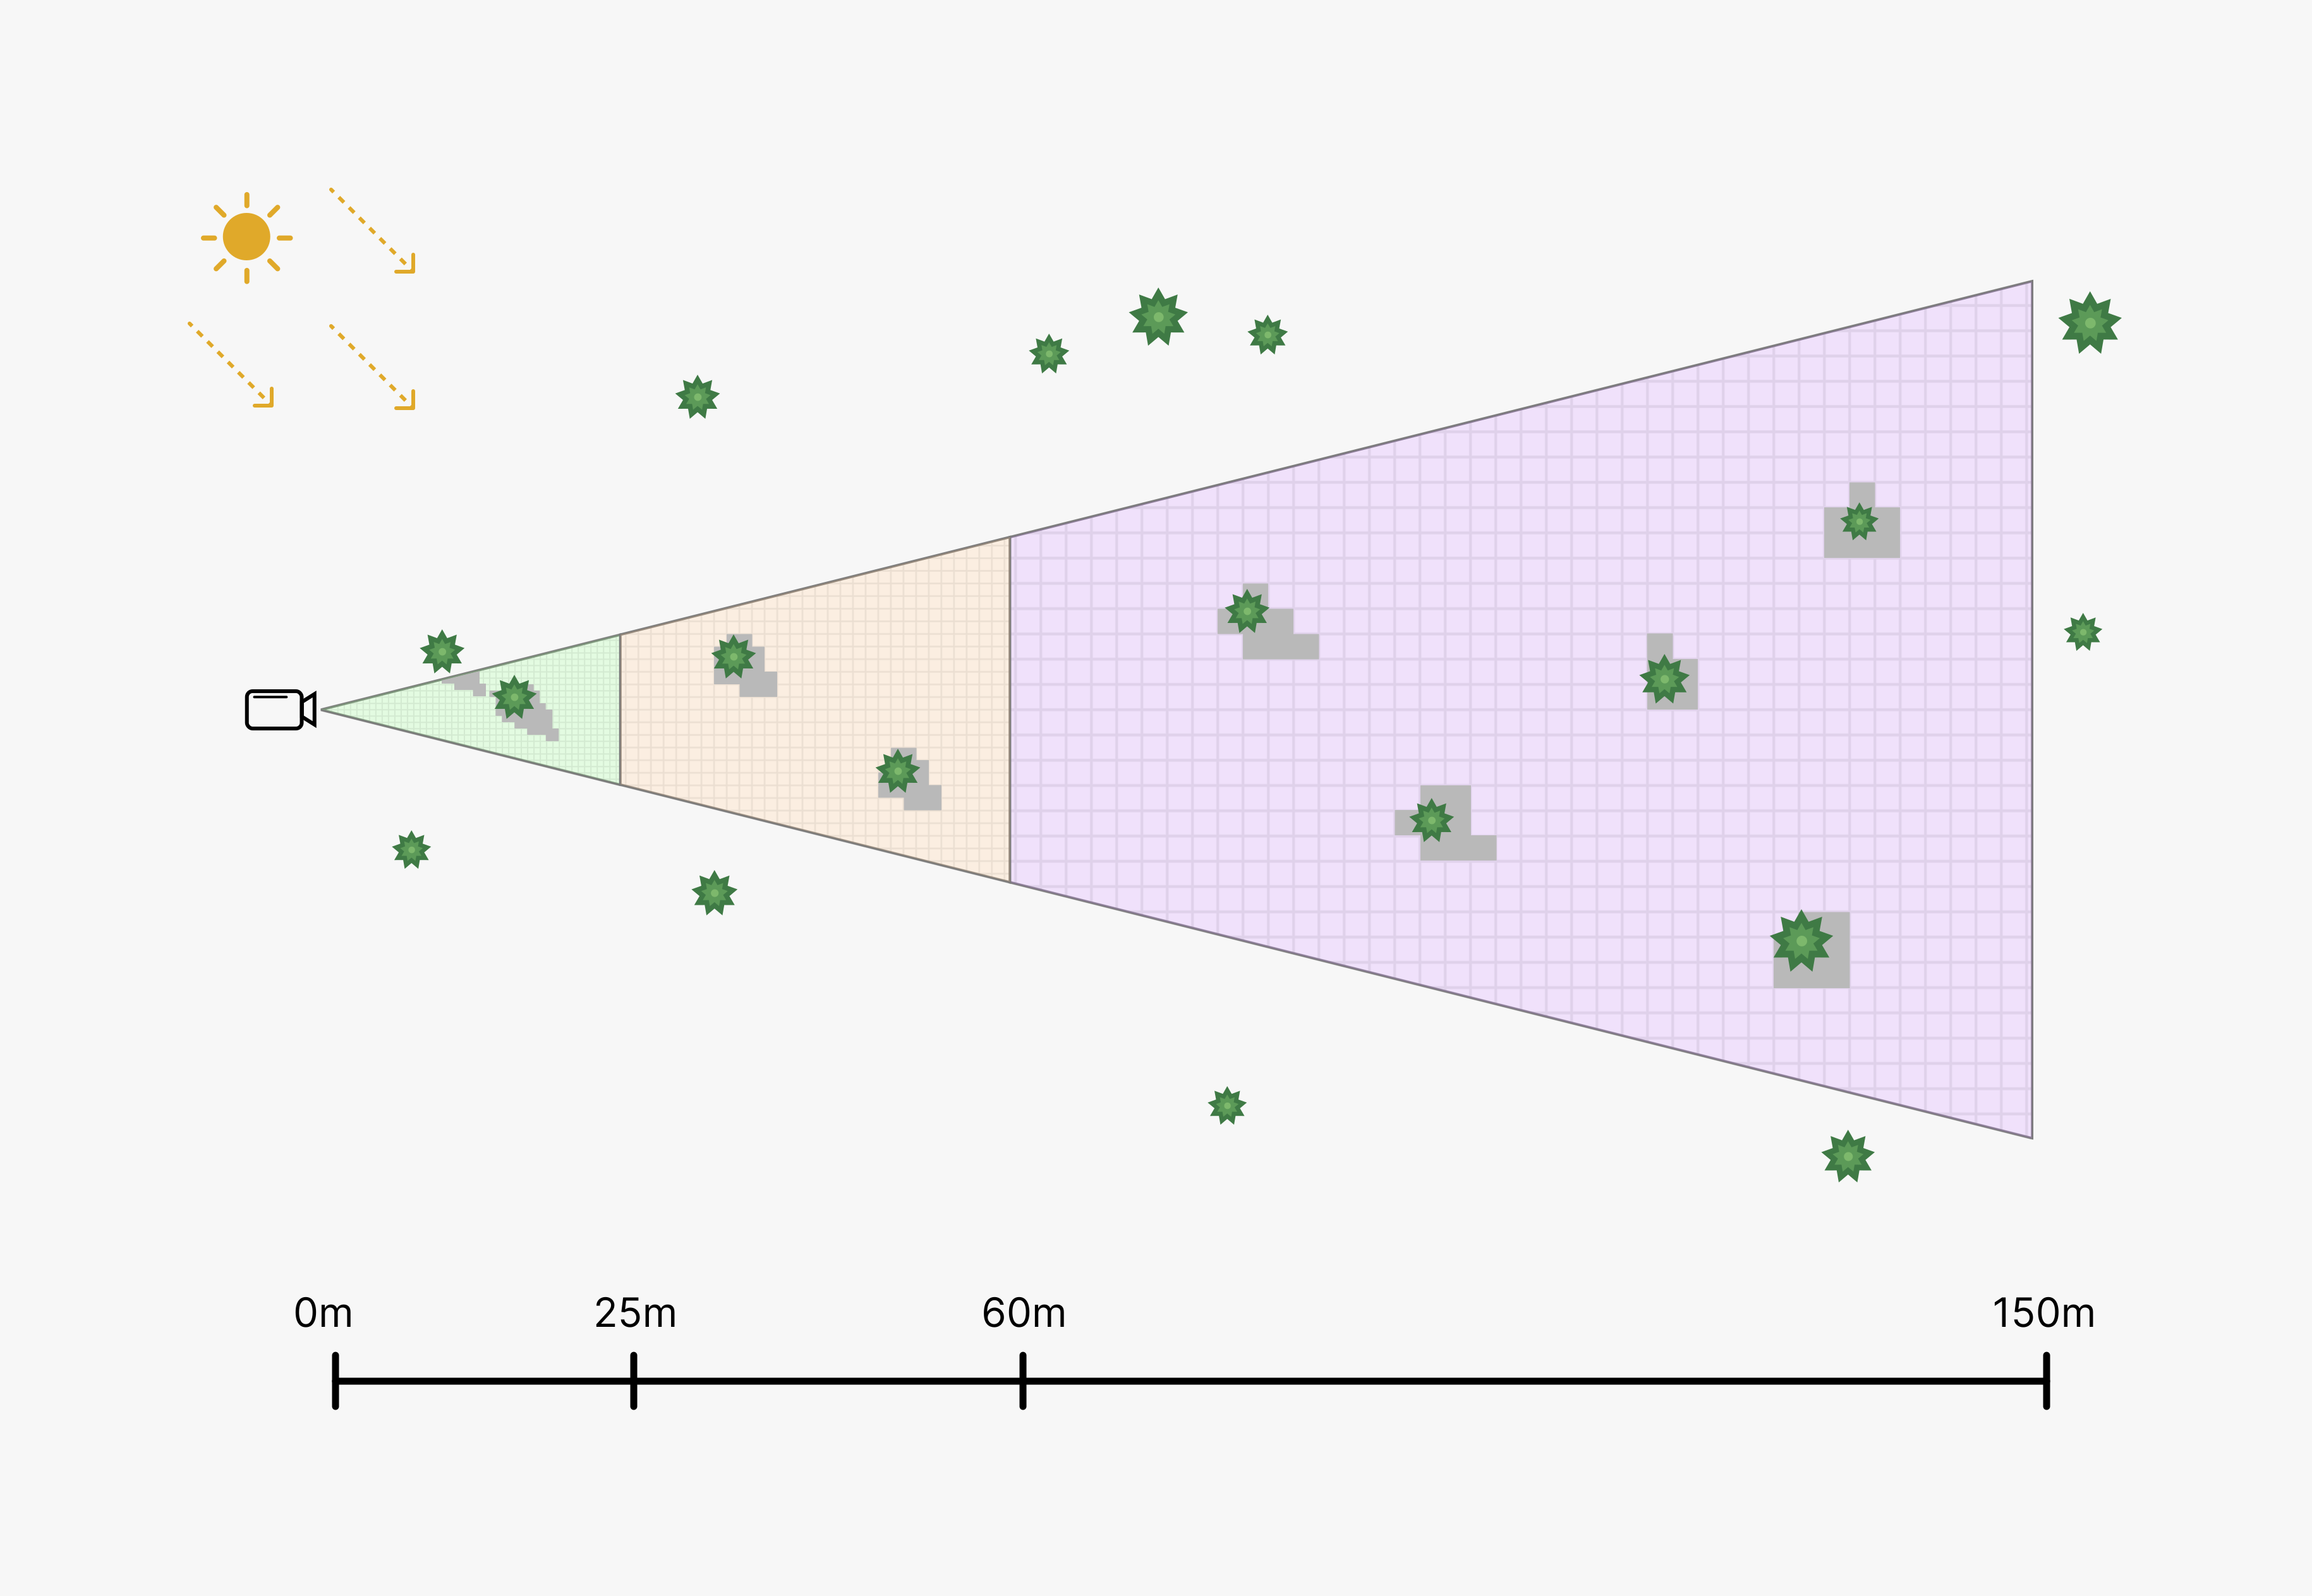
Deciding where to cut takes a bit more thought. Take, for example, a camera that sees from half a meter up to 150 meters, split
into three cascades with a 2048 map each. It’s not Revo’s camera, by the way: the range is the same, but I kept the view much
narrower so it better fits the drawings, that’s all.
There are a few common ways to place the cuts:
Uniform → slices of equal length, so the first one would run all the way to 50 meters and lose its detail.
Logarithmic → each slice longer than the previous one by a fixed factor, so the first one would end at about 3 meters
and the last one gets huge.
Practical → halfway between the two, the Three.js default, which cuts at about 25 and 60 meters.
The view cut into three slices, bigger texels the further it goes
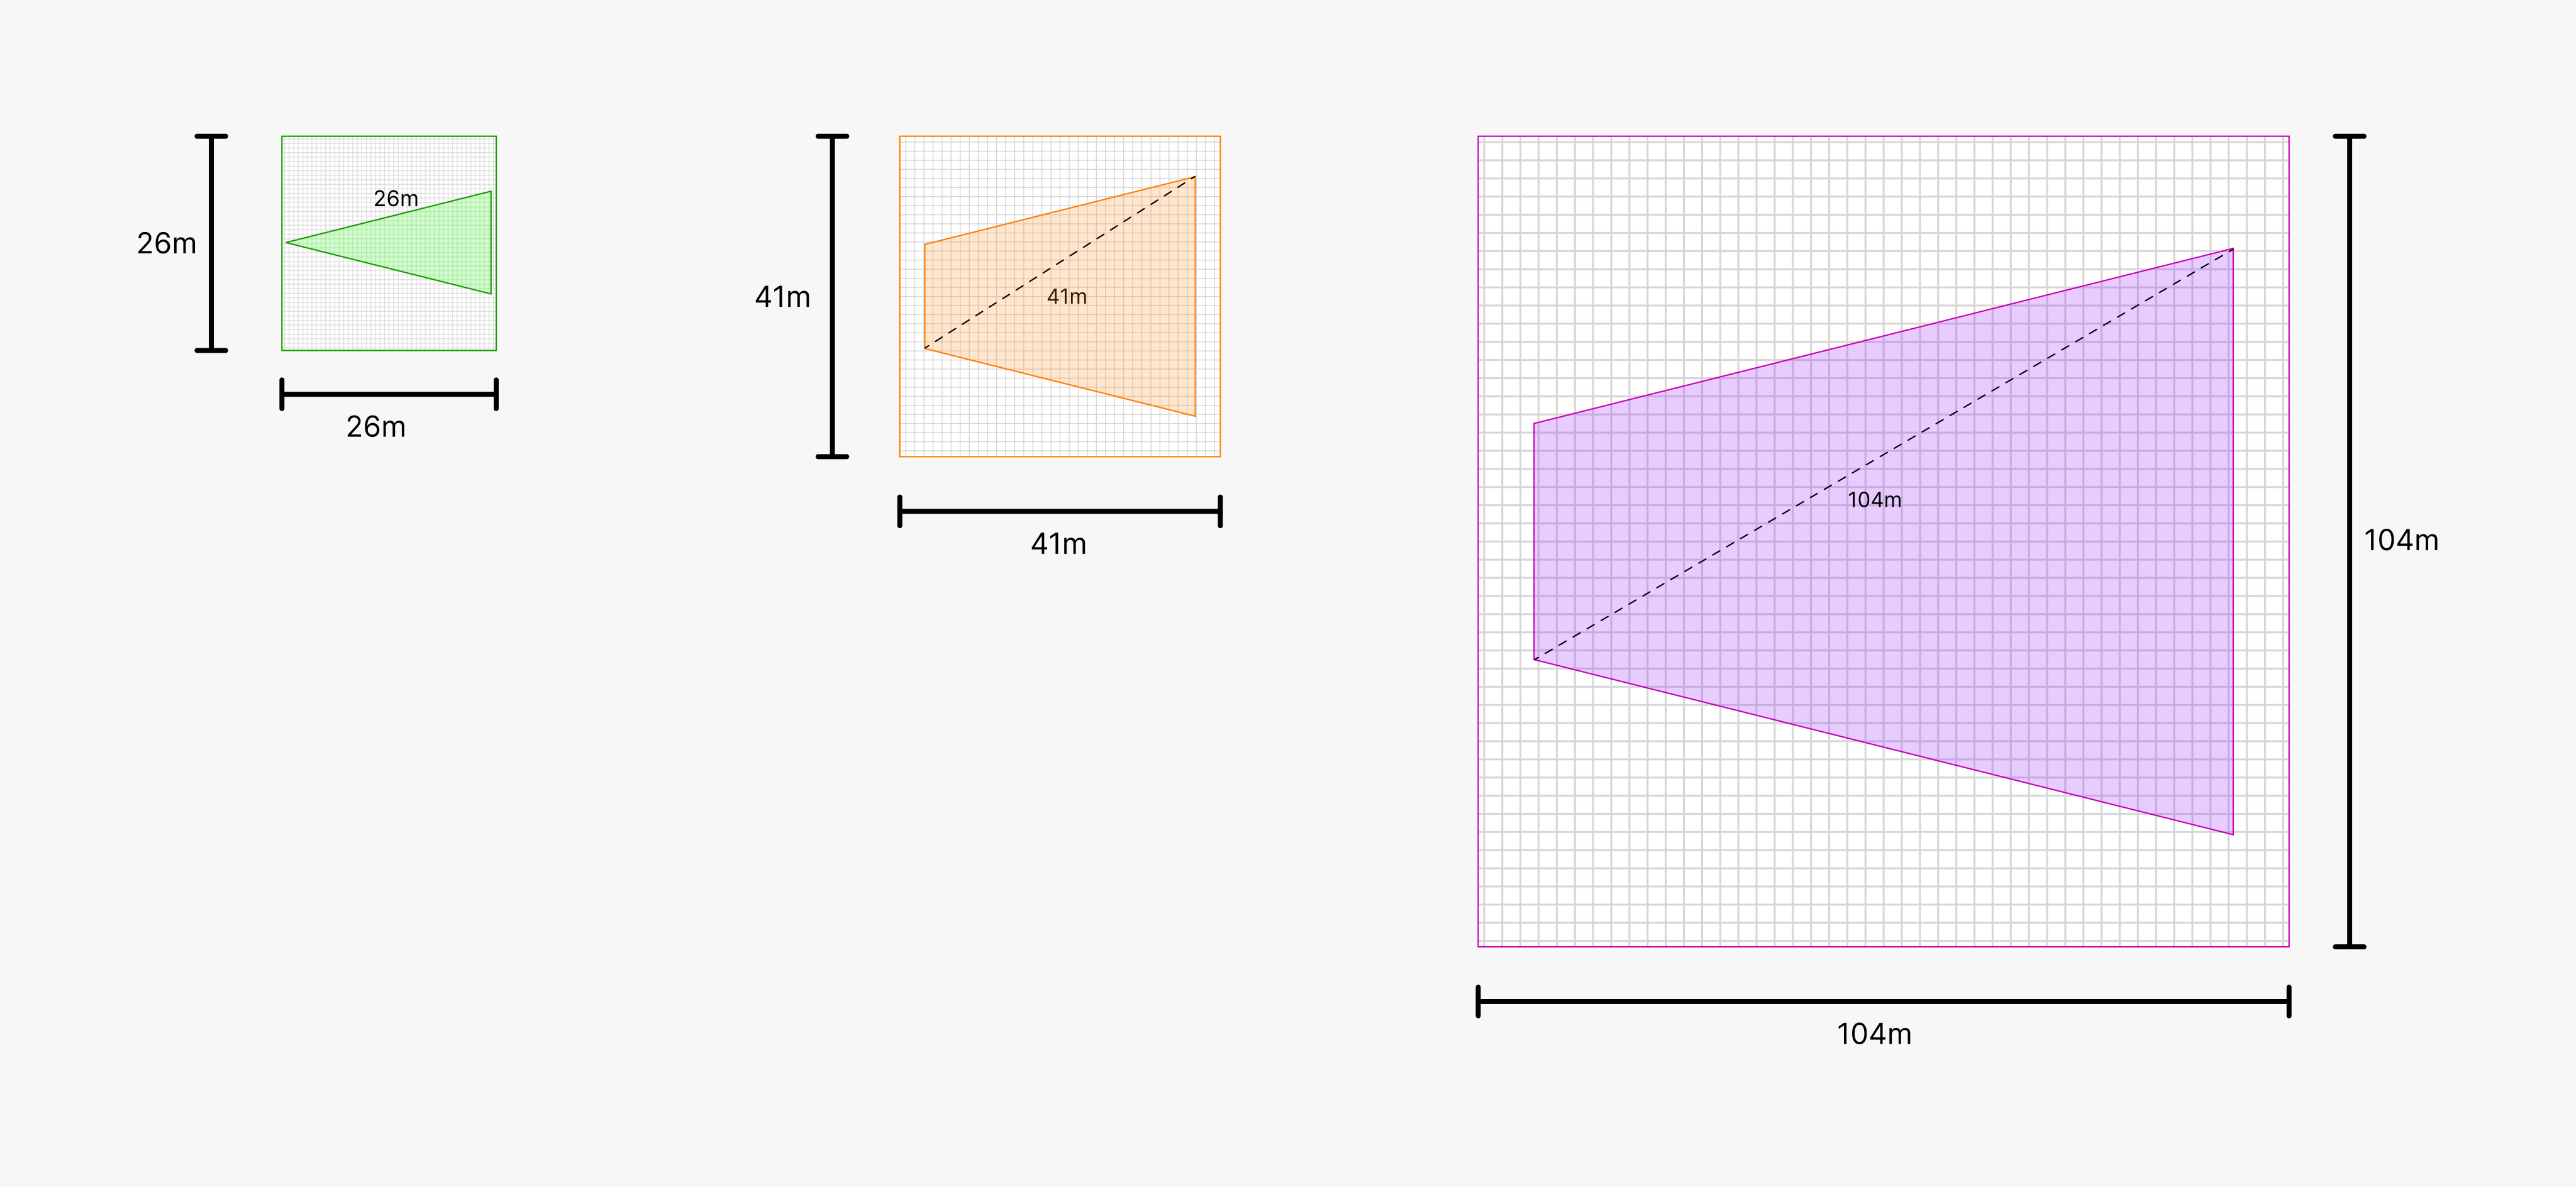
With the practical cuts, each slice gets a square map as wide as its longest diagonal, so the slice fits in it whichever way the
camera turns:
0.5 to 25 m → a map of about 26 by 26 meters, roughly 1.3 centimeters per texel.
25 to 60 m → about 41 by 41 meters, roughly 2 centimeters per texel.
60 to 150 m → about 104 by 104 meters, around 5.1 centimeters per texel.
Each slice inside its own square map, as wide as its longest diagonal
For that same view, a single 4096 map would give about 3.8 centimeters per texel everywhere. The three 2048 maps together take
48 MiB instead of 64, and still the near slice gets about three times the detail and the middle one almost twice as much. Only
the far slice loses a bit, right where the shadows are smallest on screen anyway.
Noice :)
My drawings here do cheat a little, but the idea remains the same: each map still has to hold its whole slice, whatever shape it is.
With the frustum this narrow, its longest diagonals run mostly along its length, while a real camera spreads much wider and the
width ends up deciding the size. They’re also drawn from above, while the real maps face the sun (see drawing below), and the
ruler starts at 0 instead of half a meter to keep it readable.
Shimmering, seams and off-screen casters
These maps now follow the camera around though, and that brings a few problems of its own.
The first one is shimmering, and it’s easy to picture. Whenever the camera moves, the map moves with it and lands a fraction of a
texel away from where it was, so the edges get rasterized slightly differently every frame and shadows start crawling as you walk.
The fix is to move the map only in whole texel steps, so the texel grid stays put and the edges with it. Three.js does that by
snapping each cascade’s center to its texel size.
Turning needs care too. A box fitted tightly around a slice would change size as the slice turns relative to the sun, and the
texel size would change with it. That’s the reason for those longest diagonals earlier: the square keeps the same size through
the whole turn, at the cost of some unused space in its corners.
Then there are the seams, since the ground right at a cut suddenly switches to bigger texels, from about 2 to 5.1 centimeters at
60 meters in the example above, and that jump can show up as a line on the ground following the camera around, not exactly subtle.
CSMShadowNode has an optional fade that blends the two cascades across a small margin to hide it. That same jump matters for
the bias from the previous chapter too, since bigger texels need a bigger tolerance, so Three.js scales it up for each cascade.
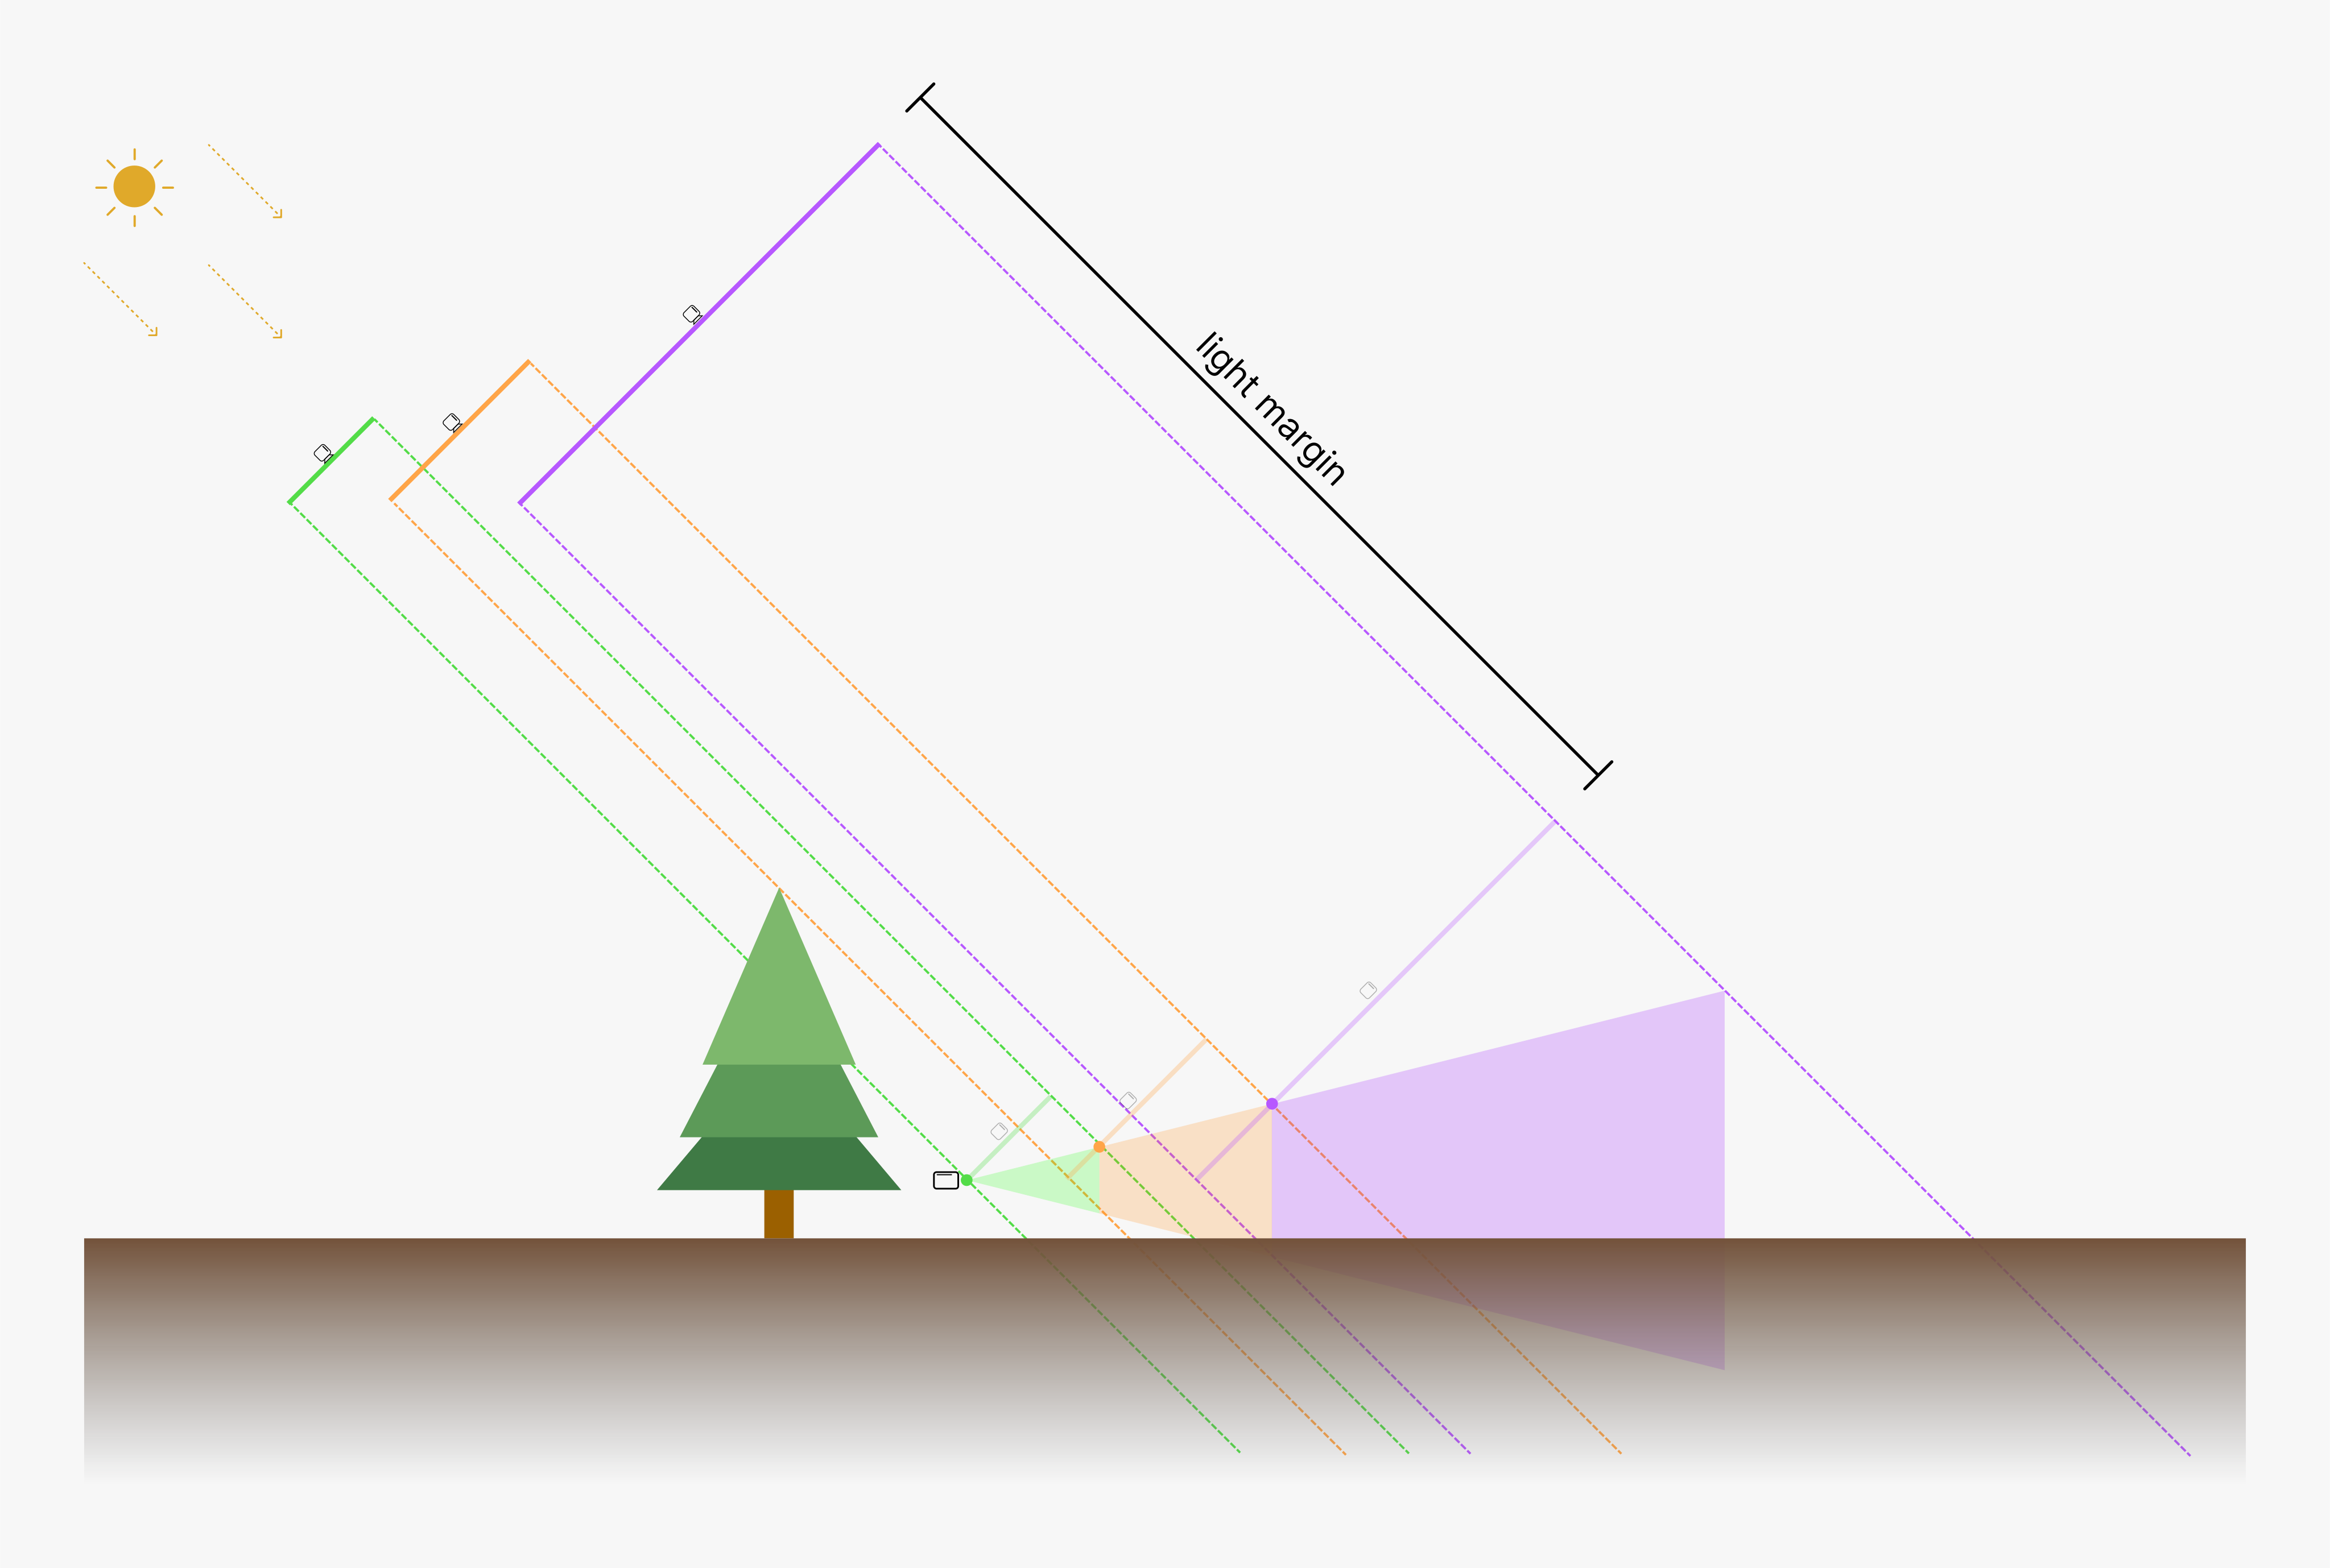
The last one is easy to miss. The cascades are rendered from the sun’s point of view, but each render still goes through an
orthographic camera, and a camera has to be placed somewhere. It only draws what sits between its near and far planes, so anything
standing further toward the sun than the camera itself never makes it into the map, even when its shadow falls right in view.
With a single shadow map, that place is the DirectionalLight’s own position: its shadow camera sits there, looks at the light’s
target, and draws from 0.5 to 500 units ahead by default. Cascades place their own light cameras instead, one per slice.
Seen from the side, each one is the faded line touching its slice, centered on it across the sunlight and placed right at its
corner closest to the sun, the dot, so the whole slice sits in front of it.
Each slice’s light camera, before and after the light margin
That’s enough to hold the slice, but not the tree. It stands behind the camera, out of view, yet its shadow still reaches into the
near slice, and it sits further toward the sun than that slice’s faded camera, so the camera would never draw it.
Three.js solves this by pulling every cascade’s light camera back toward the sun by the same lightMargin. 200 is the default,
which should be plenty for most scenes, but it’s customizable.
With that, the tree sits in front of the near slice’s camera and makes it into its map.
Unity seems to have taken a different approach to this problem: it keeps its light camera tight and flattens any caster
behind it onto the near plane, which it calls shadow pancaking.
It does sound appealing, but by then virtual shadow maps had already caught my attention, so… priorities. The name alone is
intriguing enough to tickle me from time to time, so I might get back to it someday, just out of sheer curiosity to see
what they’re cooking (pun intended).
Redrawing every frame
Even when they hold still, cascades pay the same price as the single map, just several times over. Each cascade is its own render
from the sun, and every caster that overlaps it gets drawn into it, so a tree sitting right at a cut ends up in both of them. With
autoUpdate on by default, that happens every single frame, whether anything moved or not.
In Revo, almost nothing that casts a shadow moves. The trees, the rocks that I don’t have yet but plan to add, the statue and the
campfire stay right where they are, and the sun doesn’t move unless I move it. Redrawing all of them every frame, sometimes into
more than one cascade, just to get the exact same depth back is a lot of work for nothing.
At least the work is predictable and stays the same across frames :)
One trick could be to refresh the far cascades less often, but the static stuff still gets redrawn from scratch, just not every
frame.
What I actually wanted was the opposite: draw the static stuff once and keep it, redraw only what changed, and instead of deciding
where the detail goes by distance, let the screen ask for exactly the parts of the map it needs.
That’s pretty much what virtual shadow maps are about.
3. Virtual shadow maps
After cascades, the research led me to what became my final destination on this journey: virtual shadow maps.
The more I dug into them, the more interesting they got, so I decided to try them in Revo, and I was stubborn enough to get
through it… one way or another :)
At its core, it’s a bit of a mix of both previous chapters: depth stored from the sun’s view and compared with what the camera sees,
like a classic shadow map, and more detail up close than far away, like cascades.
What’s different is how the map is laid out, and how little of it actually lives in memory.
Instead of a few maps cut along the view in sequence, there’s a stack of gigantic 16k ones (16,384 texels a side) nested around the camera,
called levels, and each level gets cut into small tiles called pages.
Of course, 16k maps compared to a bunch of 2k ones can sound a bit scary, but it’s not that bad, just trust the process.
Every level has the same number of pages and texels (same 16k maps and same subdivision), what changes is how much ground they cover.
Level 0 is the smallest, right around the camera, so each page covers just a small patch and the shadow comes out sharp. Each
level after that covers twice as much ground with the same texels, so its pages get bigger and its shadows coarser.
Close things read the small levels, far things the big ones. A bit like the mipmaps of a texture, each one with half the detail
of the one before, except these don’t shrink, they grow to cover more ground.
The levels from above, each one twice as wide as the one inside it
The same levels seen from the sun
Each color is a level, and every square is twice as wide as the one inside it. Level 0 is the grey one in the middle, a bit
brownish in the first video, since the levels are blended over the ground and the dirt path shows through.
Seen from the sun, they’re all perfect squares nested around the player. The diamond around them is simply the main map from
the sun’s perspective: the world is a square too, and Revo’s sun comes in diagonally, so from up there it stands on a corner.
Past its edges there’s nothing left to draw, which is why it’s white, but the levels keep going.
Clipmaps
Those nested squares have a name, clipmaps, and the mipmap comparison wasn’t random: a clipmap is a mipmap where every
level gets cut down to the same size around the viewer. The idea goes back to 1998, when a few people at Silicon Graphics wanted
to render the whole surface of the Earth as a single texture at one meter per texel. Its full mipmap would have taken about 11
petabytes, but only a tiny part of it is ever needed at once, so they kept just a fixed-size square of every level around the
viewer.
Virtual shadow maps use the same trick for directional lights like the sun, with the camera as the center. Every level keeps the
same 16,384 texel square around it, seen from the sun, and since a pixel picks its level by its distance from the camera, the
result is rings of sharpness that get sharper the closer they are.
Each level is a grid of 128 × 128 pages, and each page has 128 × 128 texels, which is where those 16,384 come from. Revo has 7 of
them, from 0 to 6, and what changes from one to the next is just the amount of ground covered:
Level 0 → 64 meters across, about 4 millimeters per texel. Very sharp.
Level 3 → 512 meters across, about 3 centimeters. Still good.
Level 6 → 4 kilometers across, about 25 centimeters. Only for far away stuff.
So a page on level 0 is half a meter across, and one on level 6 about 32 meters.
The level comes from the distance to the render camera: up to 8 meters away it’s level 0, from 8 to 16 meters level 1, from 16 to 32
level 2, and so on, each range twice as long as the one before, which in code is just:
const LEVEL_0_MAX_DISTANCE_IN_METERS = 8;// how many times 8m doubles to reach the pointconst doublings = ceil(log2(distanceToCamera / LEVEL_0_MAX_DISTANCE_IN_METERS));// below 4m it goes negative, and there's no level past 6const level = doublings.clamp(0, 6);
That doubling is on purpose. Each level’s texels are twice as big as the previous one’s, and something twice as far away looks
half as big on screen, so the two cancel out and the shadow looks about equally sharp everywhere.
With that, the far end of the view at 150 meters lands on level 5, at about 12.5 centimeters per texel. That’s coarser than the
5.1 centimeters of the far cascade in the previous chapter, but it’s also where shadows are smallest on screen. Right in front of
the camera, it’s 4 millimeters instead of 1.3 centimeters, about three times sharper, and that’s against a much narrower view
than Revo’s.
Honestly, I didn’t spend much time tuning how many levels there are. I tried a couple of variations, locked it at 7 and moved
on. Unreal goes with 17 by default, the widest one reaching about 40 kilometers, but Revo is a lot smaller than that.
As for cost, the levels themselves are almost free. Requested pages all go into the same fixed block of memory, whatever level
they come from, and if that ever runs out, some shadows simply won’t show up. It’s always the far ones that go first, where I’d
barely notice, so I can live with that.
What the levels do change is how many pages get asked for. A finer level 0 would make everything close to the camera ask for 4
times as many pages, more to draw and that memory filling up faster, for details I wouldn’t even notice. Fewer levels at the far end
would push distant ground onto finer pages than it needs, same problem. And more levels at the far end would cost next to nothing,
since nothing would ever ask for them past level 6.
Looking at it again while writing this, the far end of the view reads level 5, and level 6 is for things that ask for blurrier
shadows on purpose, like grass far away, so 7 is about where it stops paying off for me.
Every color is a level, the white lines are page borders
The pages in there look like long rectangles, but seen from the sun, like in the video earlier, they’re squares. With Revo’s sun
about 20 degrees above the horizon, a page lying on flat ground gets three times longer toward the sun.
The levels also overlap: the same spot on the ground exists in all of them at different resolutions, it just only gets asked for in
the one that fits its distance.
And since they’re centered on the camera rather than shaped after the view, turning around doesn’t move them at all. It only changes
which pages get requested.
Fugazi, fairy dust
Now, if all 7 levels really lived in memory, they’d take around 7 GiB, which is not something you want to hand to a browser tab.
Fortunately they don’t, and that’s what the virtual in the name is about.
A level is just a grid laid over the sun’s view, so any point can work out which page and texel it lands in from where it sits
under the sun alone. Memory then only gets used for the pages something on screen actually needs.
That memory is a pool, a block of real memory set aside once and cut into slots, one page each. When a page is needed, it
grabs a free slot and gets drawn into it, while a page table keeps track of which page sits where. Once drawn, it stays there,
cached, until something in it changes, so the next frame can skip it entirely.
In Revo, that looks like this:
7 levels → 16,384 × 16,384 texels each, about 1 GiB per level at 4 bytes per texel.
The pool → 512 pages, about 32 MiB, far less than 7 GiB.
The size of the pool is up to me, and this one I actually spent more time on.
Most of the time the camera asks for somewhere around 200 to 300 pages, but running fast through the map can push it past 600 on
some frames. I also wanted a power of 2, for no real reason other than it feeling more organized that way, so 1024 felt
wasteful and 512 ended up being a decent compromise.
The camera’s view in yellow, seen from the sun, and the pages it asks for
Remember the pine just outside the frame from the previous chapter?
The ground next to the player is on screen, so it requests the page it lands in. That page isn’t just a patch of ground though,
it’s the whole column of sunlight above it, from the sky down to the ground. The pine isn’t on screen, but it stands right in
that column, so it gets drawn into the same page, and its shadow makes it onto the ground.
Three tree shadows, only one of the trees in view
Same moment from above, two of the pines stand outside the view
So in the end, the camera decides which pages are needed, and the casters only care about which pages they cross. That’s why the
off-screen tree isn’t a special case anymore, and there’s no light margin to tune like with cascades.
It’s just how the whole thing works.
Unfortunately, paging doesn’t fix the usual shadow map problems. Each pixel still runs the same depth comparison as before, so
acne and Peter Panning can still show up and soft edges still need filtering. What paging changes is only which parts of the map
exist and get drawn.
Static vs dynamic casters
Revo, at least for now, is mostly made of things that never move, like the trees, the statue and the campfire. Redrawing their
shadows every frame would be a waste, and since every page can be cached on its own, the moving ones can get their own layer
without disturbing the rest.
Layers are arbitrary of course, but I went with the two classic ones: one for static casters and one for moving ones.
Both go through pretty much the same pipeline and just follow different rules about when their pages need drawing again.
Easier said than done, but it worked out in the end.
The API allows me to register casters in specific layers and also supports GPU positioning, alpha testing and more:
// registers a mesh as static caster, simple and straightforwardgraphics.vsmPass.registerCaster(campfire, { type: "static" });// canopy is a bunch of quads with an alpha texture applied// and opacityNode here works exactly as in the materialgraphics.vsmPass.registerCaster(pineCanopy, { type: "static", opacityNode: texture(assets.resources.pineCanopyDiffuse).a,});// registers a dynamic caster, straightforward, cpu drivengraphics.vsmPass.registerCaster(player, { type: "dynamic" });// a dynamic caster with position gpu driven// positionNode, just like opacityNode above, behaves exactly as in the materialgraphics.vsmPass.registerCaster(flag, { type: "dynamic", positionNode: clothPositionsSsbo.element(particleIndex).xyz,});
A static page lives in the 512 slot pool from earlier, gets drawn once and stays in its slot for as long as it’s needed. Moving
around only draws the pages the camera hasn’t needed before, and the coarse levels barely change, since each of their pages covers
so much ground. The trees and the statue don’t get drawn again just because time passed.
The bake became a cache :)
A dynamic page goes into a second, much smaller pool of 64 slots, and gets drawn again every frame. A moving thing only ever
touches its own layer, never the static cache underneath.
That’s the whole point of keeping the two apart. The ball rolling through a forest would otherwise invalidate every tree page it
touches, every frame, so the trees right around the player would get redrawn over and over for nothing. Instead, the trees stay
cached, the ball gets its own pages, and the two only come together at the very end, when every pixel reads both.
64 is plenty for what Revo has today. The ball uses between 5 and 15 pages and with the flag around 22 to 24, which still leaves
some room for a few more moving things, and since each slot holds 128 × 128 depths of 4 bytes, the whole pool is only 4 MiB.
If it ever gets tight, I will simply increase it.
I was also curious to see how far the whole thing could be pushed and this seems to be a decent moment to bring it in.
Realistically Revo will have a handful of moving things on screen at once, maybe 10ish, so I went way past that, just for fun,
why not: 2000 moving objects in nine different shapes, floating and circling all over the map, plus 2000 thin static pillars
between 3 and 50 meters tall, all of them casting and receiving. For this one both pools went up, the static one to 1024 slots and
the dynamic one to 512, since the usual sizes would never fit that much stuff.
A bit too much of everything, on purpose :)
The video compression washes the shadows out quite a bit, so here are two frames from the same recording, where they hold up a lot
better:
A low sun through the pillarsJust a different view
All the timings in this chapter come from my MacBook with an M2 Pro. With everything on and the camera still, it holds a
steady 120 fps. Moving around drops it a bit while the new pages come in, and
it settles again as soon as I stop. The real test is the sun. With it rotating, every page goes stale every single frame, static
and dynamic, and the frame rate drops to somewhere between 65 and 90 depending on how high the camera is, then goes straight back
to 120 when the sun stops.
Neither pool got close to full either: the static one sat around 600 to 650 of its 1024 pages, and the dynamic one around 270 to
350 of 512.
The moving objects here are all moved by the CPU, like the ball. Things moved on the GPU, like the flag, turned out to be a lot
heavier, and even a few hundred of them were enough to pull it way under 120, so I left them out of this one.
This was deliberately unoptimized, just to see what happened. If I actually needed this many objects in a scene, I’d spend time on
the geometry and draw calls too, instead of just slapping them all in there and asking the shadow system to deal with it :)
Dissecting a frame
With a classic map or cascades, the sun draws first and the camera reads the shadow while it shades, but here the camera has
to go first, since it’s the one deciding which pages are needed.
That’s how Unreal Engine 5 does it, and Blender’s EEVEE renders its shadows the same way.
Unreal’s lighting is deferred by default, meaning the geometry gets drawn first, without any light, and the lights get applied
on top of it afterwards. So by the time shadows are needed, the depth is already there, and Unreal can mark the pages from it
and draw them right away.
Three.js, on the other hand, is a forward renderer. Every material shades itself with all of its lights in one go, shadows
included, so the shadow has to exist before the camera draws anything.
The common fix in forward renderers is a depth pre-pass, drawing the whole scene once just for its depth and then again to shade
it. For me that would mean drawing everything twice, a whole field of GPU grass included…so I went a different direction.
First things first, the scene gets rendered once from the main camera, with the real materials, writing 4 outputs
through MRT (multiple render targets), which get used along the way and at the end to put the final frame together:
Color, all lights → the scene lit by every light in it, ambient included, just no shadows.
Color, sun only → the same, but with only the sun contributing, no ambient. It tells the last pass how much light
to subtract from the shadowed pixels of the all-lights color.
Shadow softness → extra control, so I can opt in for softer, blurrier shadows on foliage like the grass,
because it simply looks much better and creates less aliasing.
Color, all lightsColor, sun onlyShadow softness (black = sharp, white = soft)Depth (black = near, white = far)
Then a compute pass reads that depth for one pixel out of four, and from it rebuilds that pixel’s world position. That position
then gets projected into the sun’s view, as if the sun were the camera, to find where it lands on the shadow map.
In the same pass, the distance from the camera picks the level, like in the clipmaps earlier, and the page it lands in gets marked
as requested.
A few more small compute passes then give each requested page a slot in the pool, unless it already has one from an earlier frame.
After that, another compute pass draws the casters into the pages that just got a slot, from the sun. Only depth gets written: for
each of the page’s 128 × 128 texels, how close to the sun the nearest surface is. Together, the slots now hold the shadow map, just
in pieces.
Finally, a regular fullscreen pass goes over every pixel, finds its page the same way the requests did and reads the depth stored
there. If that depth is closer to the sun than the pixel’s own position, something stands between them, so the pixel is in shadow
and its sun-only color gets subtracted from the all-lights one. The ambient light stays, which is why shade gets darker but never
black.
Shadow intensity from 0 to 1, shadows only take away the sun they block
So the shading itself is still forward, and only the sun’s shadow gets applied afterwards, deferred style :)
Page requests
The request pass is the first thing that runs once the scene has been drawn, since it needs that frame’s depth. Right before it, a
tiny pass clears all the bits, and from there everything happens in the request pass itself. It doesn’t run on every frame,
only when something changes what the camera could be asking for: the camera moving or turning, the sun moving, or a caster being
added, moved, or removed.
Every page of every level gets a single bit, all packed into one buffer, 32 bits per number. That’s 7 levels of 16,384 pages,
about 115,000 bits, only 14 KiB. A 1 means the page is requested, a 0 means nobody asked for it.
For every point visible on screen, the request pass picks its level and works out which page of that level it falls in, as a
coordinate on the level’s page grid in the sun’s view.
A point close to the edge of its page needs a bit more. The shadow filter later reads a few texels around it to soften the
edge, and some of those can fall on the neighbouring page. If nobody requested that one, it has no depth in it, and the shadow
breaks right at the border. So the pass also requests every page within 3 texels of the point, which most of the time is just the same
page anyway.
For every requested page, the pass already knows its level and its column and row in that level’s grid, and it packs all three
into a single number, the page’s key: the level times the 16,384 pages of a level, plus its row times 128, plus its column.
That number is exactly where the page’s bit sits in the buffer.
Let’s consider a pixel showing something about 5 meters from the camera:
level 0, since it's closer than 8 meterspage column 70, row 3 in level 0's gridkey level × 16,384 + row × 128 + column = 454 0 × 16,384 + 3 × 128 + 70 = 454number 454 / 32 = 14, the 15th number in the bufferbit 454 - 14 × 32 = 6, the 7th bit inside it
Setting that bit to 1 is all it takes to request the page. In code, key.div(32) gives the number and key.mod(32) the bit.
In the sun’s view the page grid goes on forever, but a level only covers the 128 × 128 pages around the camera, its
clipmap window. A page outside it can’t be requested, since its key would wrap around onto a different page.
And since thousands of pixels want the same few pages, and GPUs really don’t like many threads writing to the same address at
once, the pass reads the bit first and only writes it when it isn’t set yet. For each of those pages, that looks like this:
The request bits only say which pages are needed right now, but they get cleared and rebuilt every time the request pass runs.
Static pages on the other hand stay cached in their pool, so they don’t get drawn again for nothing, and to keep track of what’s
where in that pool I use two storage buffers.
The first one is the page table. Despite the name, it’s just a flat buffer with an entry for every page that could exist,
114,688 in total, whether the page is in the pool or not. Each entry holds four numbers, but the static pool only needs the first
one, which points to the page’s slot. If page 454 sits in slot 17, entry 454 points to 17.
The second one is the slot metadata, with an entry for each of the 512 slots. Entry 17 knows four things about whatever sits
in slot 17:
Page key → which page sits in the slot, 454 in this case.
Page tag → a second check that the slot holds the right page, since as the camera moves, two different places can end
up with the same key. It’ll make more sense in a few paragraphs.
Last requested frame → say 1200. If the requests change at frame 1260 and page 454 isn’t among them, it stays at 1200,
and slot 17 is up for grabs.
Generation → the counter’s value when page 454 was drawn, say 5. The depth is up to date as long as the counter is
still 5.
Every slot compares its generation against a single counter the pool keeps, which makes it easy to invalidate either the whole
pool or just a few pages. When the sun moves, every page goes stale at once, so instead of going through all 512 slots I simply
bump the counter and none of them match anymore. It’s a known trick, also used outside of graphics where a shared version number
invalidates a whole group at once when it goes up.
When a still object moves, only the pages under its old and new position go stale, and bumping the counter would throw away every
other page too. So only those get their copy set to 0, which the counter never takes, while the rest of the pool stays as it is.
Still objects that move are also where my “favourite” bug came from. Past the edge of the map there’s a large flat terrain plane
that follows the player, so there’s always ground under your feet. A flat plane can’t cast a shadow on anything, but I had
registered it as a static caster. So every frame it moved, and every frame the cache dutifully threw away every page it touched,
which was basically all of them. The system was doing exactly what I asked it to do…as it always does.
Taking the plane off the casters made a huge difference, above all on the occasional frames that take much longer than the rest,
the ones that feel like a stutter, which had been going through the roof.
There are 2 hard problems in computer science: naming things, cache invalidation and off-by-one errors.
Leon Bambrick
This time it was the second one :)
In the page table the index is the page key, and in the slot metadata it’s the slot number, so neither has to store it. Both get
created once on the CPU and never grow:
const VSM_PAGE_GRID_SIZE = 128;const VSM_PAGES_PER_LEVEL = VSM_PAGE_GRID_SIZE ** 2;const VSM_LEVEL_COUNT = 7;const VSM_PAGE_COUNT = VSM_PAGES_PER_LEVEL * VSM_LEVEL_COUNT;const VSM_POOL_CAPACITY = 512;// 0 is a valid page key, so empty slots hold the largest uint insteadconst VSM_INVALID_PAGE_KEY = 0xffffffff;const pageTable = new StorageBufferAttribute( new Uint32Array(VSM_PAGE_COUNT * 4), 4,);const initialSlotMetadata = new Uint32Array(VSM_POOL_CAPACITY * 4);for (let slot = 0; slot < VSM_POOL_CAPACITY; slot++) initialSlotMetadata[slot * 4] = VSM_INVALID_PAGE_KEY;const slotMetadata = new StorageBufferAttribute(initialSlotMetadata, 4);
On the GPU, every entry is read as a uvec4:
const { x: staticSlotPlusOne, // static pool slot + 1, so 0 can mean no slot y: touchedFrame, // last frame a moving caster covered this page z: dynamicSlot, // dynamic pool slot, only valid while touchedFrame is current w: activeFrame, // last frame the camera needed this page} = pageTable.element(pageKey);const { x: slotPageKey, // the page this slot holds y: slotPageTag, // its exact coordinates, since wrapped pages share a key z: requestedFrame, // last frame it was requested, an older one makes the slot reusable w: slotGeneration, // copy of the pool's counter, stale once the two differ} = slotMetadata.element(slot);
The other three numbers of a page table entry belong to the dynamic layer.
Whenever the requests change, a few small compute passes go through every requested page. Page 454, for example, can end up in one
of three ways:
It already has a slot → entry 454 points to slot 17, and slot 17 still says 454 with the current generation. The page keeps
its depth, and slot 17 gets the current frame number.
It has no slot → it goes on a list of missing pages. Any slot that didn’t get the current frame number is free to take,
empty ones first and then the ones holding pages nobody asked for. Once page 454 gets one, both buffers are updated.
No free slot is left → it stays missing, and so does that bit of shadow.
Finer levels get first pick of the free slots, since close detail is what you’d notice. When the pool runs out, it’s the pages far
away that go without, and I’d rather lose a bit of distant shadow than the one “under your feet” :)
Blender and Unreal hit the same wall when their pools run out: Blender shows a “shadow buffer full” error, and Unreal’s docs warn
that going over the limit corrupts the shadows, checkerboard patterns included.
The page table has one catch though. Each level only covers the 128 × 128 pages around the camera, and as the camera moves, the
pages coming in on one side reuse the entries of the ones that just left on the other. On level 0, for example, entry 454 can
stand for a page right here or one 64 meters away. That’s what the page tag is for: a lookup only counts if the tag matches too.
Drawing pages in compute
Once a page has its slot, the next step is drawing the depth from the sun into its texels.
Pulling back the already familiar page 454, I imagined this whole process starting from a ray of sunlight going straight towards
the scene, only instead of a thin arrow, it was a square tube or beam*, 128 texels on each side, that goes way past the scene as
if it never ended. Its hollow part is subdivided into smaller squares, each one a texel of the page.
*Like an SHS (Square Hollow Section), one of the many things I’m still getting familiar with while working on
Böbius, the Eurocode design project I’m building with a friend. Since there’s no SHS
128 in our catalogue, this one would have to be custom made.
Looking down that tube from the sun’s side, each square represents a single number: how far the first thing it hits is from the
sun. Turned into an image, those numbers draw a silhouette of the scene, only not in plain black and white, but in shades of
grey going from near (close to 0, darker) to far (more towards 1, lighter).
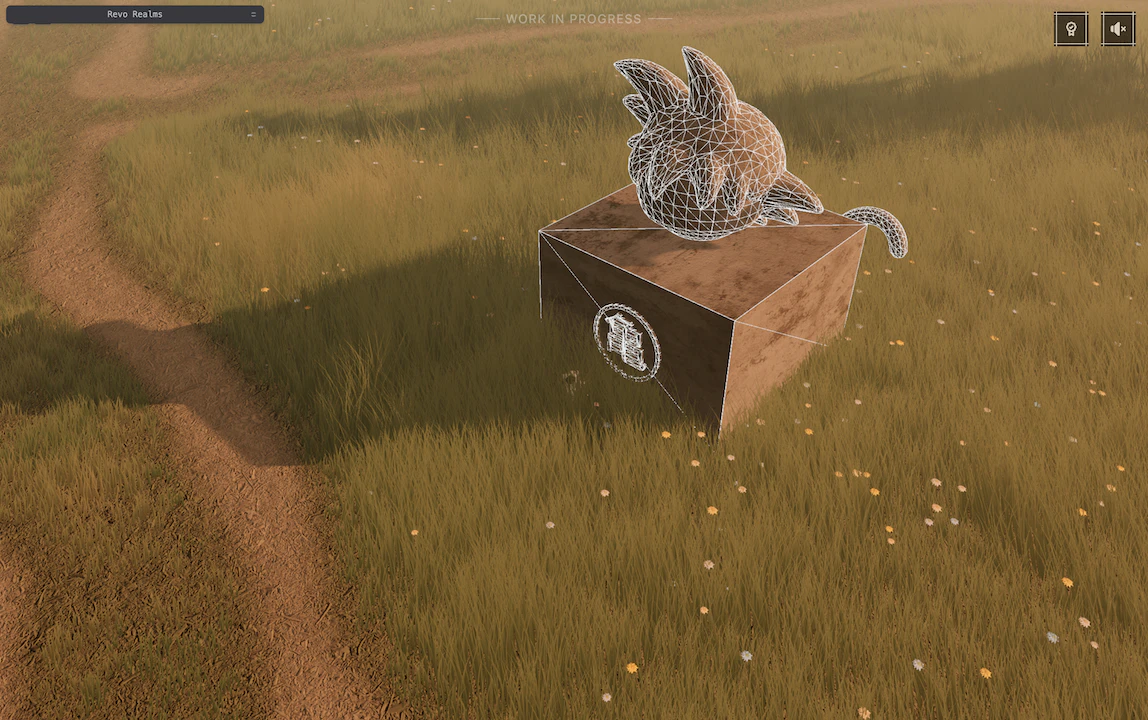
This is no different from the usual rasterization. Every mesh is made of triangles (you don’t say…) and rasterization is the
process of working out which squares of a grid, pixels on a screen or texels in a page, each of those triangles covers.
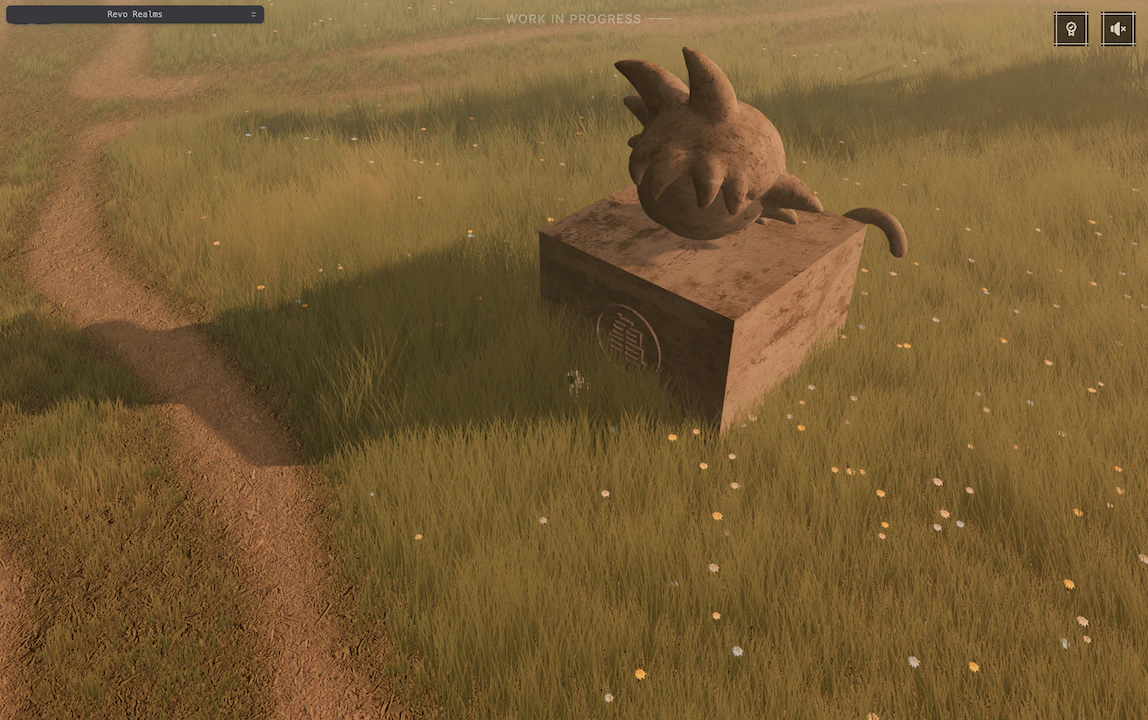
The statue as you see itThe same statue, triangle by triangle
Every texel starts at 1, the farthest possible, and a triangle only writes its distance into the texels it covers, the ones whose
center is inside it. The GPU normally does this for us in hardware, every time anything gets drawn, so we never really have to
think about it. It’s just maths though, and a CPU can do it too. The first 3D games did exactly that, before graphics cards took
over.
A texel is filled when its center lies inside the triangle or on an edge.
Here it’s even simpler than usual, no colors, no lighting, just a distance per texel. That’s it.
The usual way is a render pass, the GPU’s normal way of drawing: the CPU tells it what to draw, and the hardware turns it into
pixels.
The starting point is therefore a render pass that draws the casters as the sun sees them into one big texture atlas, divided into
128 × 128 tiles, one for every slot, and all it needed to store was how far the closest caster was from the sun at every
texel, essentially the depth.
The naive way would be a draw call for every caster in every page it lands in: the statue into page 454, the statue again into
page 455, a pine into 454 as well, and so on, each one a separate order the CPU has to send.
With a few casters that’s fine, but with a whole forest the count explodes. The common way around it is a multi draw indirect,
one single call that runs a whole list of different draws stored in GPU memory.
This is where I hit the first obstacle, because WebGPU doesn’t support it.
Thankfully it can be done in just a couple of draw calls no matter how many casters there are, within reason, of course, and
it all starts with a question I never even thought to ask: English or Spanish?
I’ve mastered the ability of standing so incredibly still…
Also, but more importantly, the real question here: what gives a caster its shape? Is it the material or is it the geometry?
For the statue, or the bark of a pine, it’s the geometry. The triangles are the shape and that’s it, simple. The pine canopy is
another story: its triangles are only a rough outline, and the needles come from the material, which runs an alpha test and
throws away every pixel its texture marks as see-through. A different story, but one with a good ending, and so far these two
buckets have been enough for everything I’ve thrown at them.
Divide et impera. The dividing has only just started, but first, the part that honestly blew my mind.
I use instancing for the grass: one draw call, one “draw this” order from the CPU, and the GPU draws the same geometry with the
same material as many times as I ask, while each copy, an instance, gets its own spot, size and sway. A single blade, over a
million times.
In my case, the same material was the easy part, every opaque caster could share one that just writes depth.
The same geometry was a bit tricky, because to me it meant the same shape, so a statue and a pine could never be copies of each
other. And that’s exactly where I was dead wrong: the same geometry doesn’t mean the same shape, just the same number of vertices,
and where each vertex ends up is the vertex shader’s business.
I had the proof in front of me the whole time, every blade swaying, bending and turning its own way, and still I had to read it
spelled out to see it. Something so simple…
It’s always a nice roller coaster :)
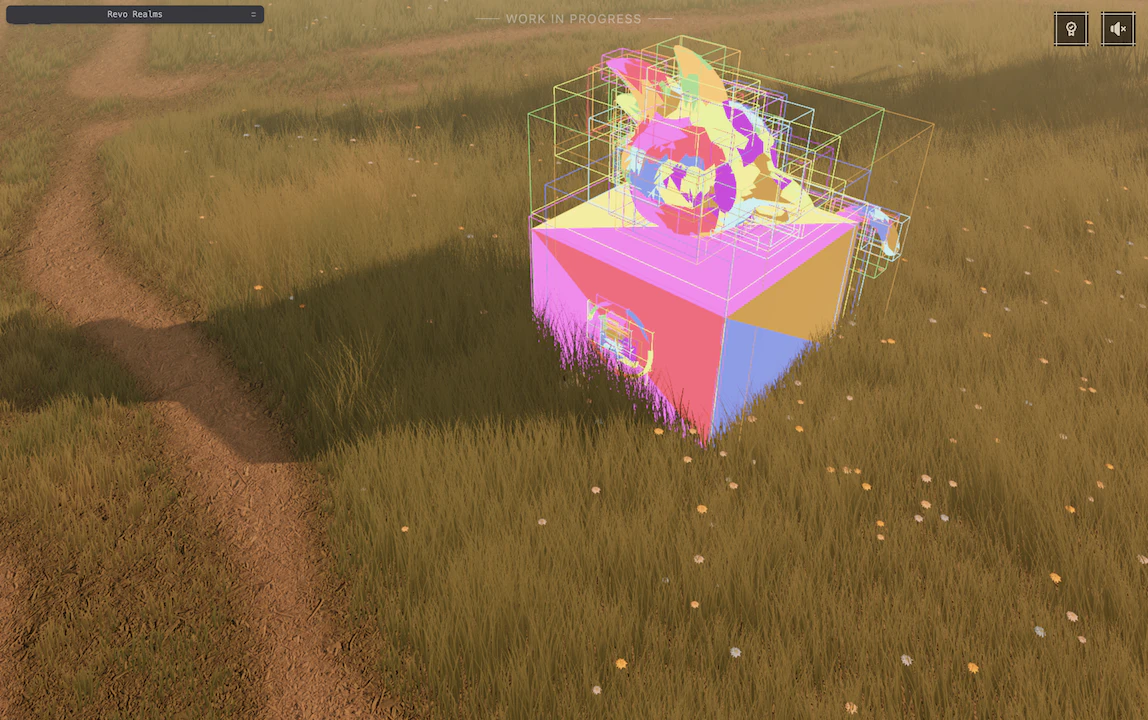
So, how did I give a statue and a pine the same number of vertices exactly? I didn’t, at least not in the literal sense. I cut them
into clusters, also called meshlets, small patches of 64 neighbouring triangles, and any group that came out with fewer got
padded with triangles of zero area, which cover nothing.
This way, every cluster had exactly 192 vertices, so every cluster was a copy of the same thing, and each vertex simply went where
its own caster would have put it anyway.
A side note on the grouping: it’s meshoptimizer that decides which triangles end up
together, picking ones that sit close to each other, so every cluster stays a compact patch. Initially I just took them 64 at a
time in the order the model came with, and the statue looked like confetti:
Clusters in the order the model came withClusters built with meshoptimizer
Honestly, I couldn’t measure any real gain from switching, but a compact cluster touches fewer
pages than one scattered all over the statue, so in theory fewer of them get sent where they draw nothing.
And it’s the proven way of building clusters anyway.
All those vertices got copied into one big buffer, only once at startup, exactly as the model was made, before anything places it
in the world, and that includes the shared ones. A mesh normally stores a vertex once, even when six triangles meet there, and
lets the triangles point at it through an index, but my clusters give every triangle its own three vertices, so that same vertex
gets written six times, sometimes in a few different clusters. It’s a bit more memory, but every copy goes through the exact same
maths, so neighbouring triangles still meet perfectly, no cracks, and that’s one less headache in this whole thing :)
Placing them was up to a much smaller buffer next to it, with one matrix per caster, so when something moved only its matrix
changed, never its positions. And since a pine is a pine, its clusters got built once and every pine in the forest read the same
ones, each through its own matrix.
The draw itself just asked the GPU for a number of copies of 192 vertices. In the vertex shader, the instance index told me
which cluster to draw into which page, and the vertex index which of its 192 vertices, so the right position could be pulled
straight from that buffer.
This is usually referred to as programmable vertex pulling, since the vertex shader isn’t handed its vertices but
fetches them from memory by itself.
The GPU even wrote that number of copies itself, after checking which clusters touched which new pages, so the CPU sent the order
once without ever knowing how many there would be. That’s an indirect draw, and with it every opaque caster went in a single
draw call.
The second obstacle was in the atlas itself. Each page owned one small tile, while a draw normally fills the whole texture. So
after projecting each vertex onto its page, the vertex shader scaled and shifted it so the page landed on the correct tile.
Triangles near the edge of a page often reached past it, and that part ended up in a neighbouring tile.
A draw also only writes inside its viewport, a rectangle that covers the whole texture by default but can be set to any part
of it. Hardware cuts off whatever falls outside before it ever turns into pixels, so with a viewport per tile the spilling
would have been handled for free.
Metal, Vulkan, D3D and OpenGL have viewport arrays for exactly this, a list of viewports in a single draw where each
triangle picks its own. WebGPU doesn’t. It does allow a different viewport for every draw, but a draw per page would have taken
me straight back to the “too many draw calls” problem.
So I worked around this one by throwing work away. The triangles got rasterized whole, and the fragment shader discarded every
pixel outside its tile, so it wouldn’t overwrite another page’s depth. It worked, but at a price, and it showed as soon as I got
near the pines, where the pages get finer: the big canopy triangles spilled over so many tiles, all those pixels computed just to
be discarded, that everything lagged like crazy. I was already holding my nose at that point.
The third obstacle, the one I simply wasn’t able to get around, was about skipping a render pass based on something only
the GPU knows, like how many pages just got a slot. WebGPU doesn’t have support for this either, and the only way out was for the
CPU to read it back, a frame late and with another costly round trip. So I didn’t, and the pass ran every time the camera moved,
loading and storing its whole 48 MiB target, even with nothing new to draw… talk about wasted work.
That was enough render pass for me. I decided to switch to a compute shader and rasterize the triangles by hand. After all,
it’s just a bunch of maths…right?
Snap!
Mostly, yes, and at least none of those obstacles.
Every cluster could only write into the texels of its own page, so nothing spilled over anymore, and since the GPU itself works
out how much there is to draw, a frame without new pages finds an empty list and stops right there. No unnecessary 48 MiB to load
and store.
Unreal seems to be doing something similar, at least partly. Nanite rasterizes its small triangles in compute too and leaves the
big ones to the hardware, and its docs say plainly that geometry without Nanite is much more expensive to draw into pages.
Revo has no Nanite, so compute does it all.
Rasterizing by hand in a compute shader might sound scary, and I can confirm it’s not as straightforward as I would have
wished. Nonetheless, with a bit of stubbornness and a lot of overthinking, it can work out, and the idea behind it is actually not
that hard to grasp.
I implemented it as four compute passes, one after the other.
The first one resets the new pages, every texel back to the furthest possible from the sun (max depth, 1), so nothing from
whatever the slot held before survives.
The second one works out where every cluster lands as the sun sees it. Each cluster already has a box around its vertices,
computed once at startup in the caster’s own space. The pass transforms the box’s eight corners into world space using the
caster’s world matrix, and then projects onto the sun’s view keeping the smallest rectangle that holds all eight (like a 2D
bounding box). For static casters it only runs again when one of them changes or the sun turns.
The third one matches those rectangles with the new pages. Every new page is a square on that same view, so for every cluster
the pass checks which of those squares its rectangle overlaps, and each overlap becomes an entry in a list, like “cluster 12 into
page 454”. This tells me what needs to be rasterized, and where. Which pages get redrawn was already settled by the requests, this
only decides which clusters each of them needs, instead of drawing every cluster into every page. And since the rectangles are a
bit generous, now and then a cluster lands on a page it just misses, where the raster pass simply finds nothing to draw.
The fourth one, the raster pass, is actually the simplest (not that the others are that hard), and it follows a very linear
path for every triangle:
Move the three vertices from local to world space with the caster’s matrix, then project them onto the page as the sun sees
it, so each one ends up with a position in texels across the page (x and y) plus its depth (z).
Take their bounding box and clamp it to the page’s edges, so only texels inside the page get visited, and drop the
triangle right away if it misses the page or has no area.
For every texel in that box, check whether its center falls inside the triangle, the rule from the sketch above, so only the
texels the triangle really covers go on.
For alpha tested casters like the pine canopy, look up a mask baked at startup at that spot, so texels where the texture is
see-through get skipped and the gaps between the needles stay empty.
Blend the depths of the three vertices using the area weights at the texel’s center, so every covered texel gets its own
depth.
Compare that depth with the one already in the texel and keep whichever is nearer the sun, as a single step, so two
triangles landing on the same texel can’t overwrite each other.
Step 4 is the good ending I promised for the canopy. It used to need a raster pass of its own to check its texture, and now its
opacity gets baked once into a 256 × 256 mask, just 8 KiB, so it sits in the same list as everything else. I tried going
smaller, but the shadows got visibly blocky, while next to a 1024 one I can barely tell the difference.
Steps 3 and 5 instead took me a while to properly understand, first when I was learning how this works and again now, trying to
explain them in simple words, so here’s an example that I hope makes them easier to picture.
Imagine walking a loop around a tree in a park. Whichever direction you walk, the tree stays on the same side of you the whole
way round: on your right if you go clockwise, on your left if you go counterclockwise.
Checking whether a texel’s center is inside a triangle is the same walk, with the vertices as the stops. Stand on A, face
B, and ask which way you’d have to turn to face the point instead, left or right, whichever is shorter. Then do the same from
B facing C, and from C facing back to A. If it was the same turn all three times, the point is inside, otherwise it’s
out, and if there’s no turn at all, the point lies on that edge, which counts as inside. That’s the whole trick, and it works for
any shape without dents, so not for an L shape for example, but a triangle never has any.
In maths, that turn is a 2D cross product. The 3D one is probably more familiar: it takes two vectors and gives back a third one
standing perpendicular to both (the right-hand rule, with the thumb, index and middle finger), which is how you usually get the
normal of a surface from two of its neighbouring points. With two vectors lying flat on a page, that third one can only stick
straight out of it, towards you or away from you, so everything boils down to a single number. You multiply the vectors
crosswise, the x of one by the y of the other, subtract, and the sign tells you which way you turned. That’s the edge
function, with one vector along the edge and the other towards the point:
// the sign gives the side of the edge, the magnitude gives twice the areaconst getEdgeValue = ( from: Node<"vec2">, to: Node<"vec2">, point: Node<"vec2">,) => { const edge = to.sub(from); const toPoint = point.sub(from); return edge.x.mul(toPoint.y).sub(edge.y.mul(toPoint.x));};
Step 3 is just that, three times, with the texel’s center as the point.
Step 5 uses the number itself, not only its sign. Once I know a texel is covered I still need its depth, and I only have one at
each vertex, so the idea is to let each vertex count more the closer the center is to it. How much each one counts is its
weight.
Connect the point to the three vertices and the triangle splits into three smaller ones, each across from a vertex. Move the
point towards A and the one across from A grows, until it covers the whole triangle when the point reaches A. Move it onto
the far edge and it disappears. So A’s weight is that small triangle’s area divided by the whole triangle’s, and the three
weights always add up to 1.
The edge function hands me those areas for free. Take the edge from A to B as the base: the number it returns is the
length of that base times how far the point sits from it, which is the base times the height. That’s the area of the
parallelogram the two vectors make, and cutting it along its diagonal gives two copies of the triangle between A, B and the
point, so the number is exactly twice that triangle’s area. It’s also why it drops to 0 when the point lands on the edge: no
height, no area.
The edge from B to C gives the small triangle across from A, the other two go round the same way, and the whole triangle
is the edge from A to B with C as the point. The twos cancel out in the division, and since walking the other way round
flips both signs, the order of the vertices doesn’t matter either. A point outside always ends up with a negative area
somewhere, which is why in my code step 3 is simply checking that none of the weights is below 0.
Below, the solid arrow is the edge from A to B and the dashed one goes to the point, with the turn written on it. The
hatches are the three small triangles and the numbers under them are their weights, so drag things around and watch them change.
InsideAweight 0.32 Bweight 0.34 Cweight 0.34
+ means the point is to the right of the solid arrow, - to the left,
and 0 right on it
Then the blend: multiply each vertex’s depth by its weight and add them up. With A at 0.32, A’s depth makes up 32% of the
texel’s. If that sounds familiar, it’s what the GPU does to every value on its way from the vertex shader to the fragment
shader. Here I just do it myself.
Worth mentioning that a point right on an edge shared by two triangles gets written by both, which is harmless, since their
depths match there.
That’s one triangle, and a page can get thousands of them, so this is where the GPU’s parallelism comes in.
A compute shader runs as many threads at the same time, each one a copy of the same code working on its own piece of data.
Threads come in workgroups, small teams that run side by side and share some fast memory only they can see.
Here’s the fourth pass as a whole, stripped down to its bones:
So, in short: every workgroup takes an entry, a cluster for one page. Each of its threads projects one triangle of the cluster,
everyone waits at a barrier until all of them are done, and then the whole workgroup goes through the triangles one by one,
every thread filling in its share of the texels. Then everyone waits again before taking the next entry.
Why not give every triangle its own thread and run them all at once? Because triangles can be very different in size.
One covers a single texel, a big canopy triangle a good part of a page. And GPU threads don’t run on their own, they move in
small groups (32 on my M2 Pro) that go through the code together, so a group is only done when its slowest thread is. One thread
stuck on a big triangle would keep the others in its group waiting, doing nothing.
So the work gets split by texel instead of by triangle: triangles can be any size, but every texel costs the same. The workgroup
shares every triangle between its 64 threads, so on a big one every thread gets about the same number of texels, and on a tiny one
most of them sit out a round that’s over almost right away, so a mix of big and small triangles like the statue’s is fine.
They all need the same vertices, so each triangle gets projected only once, into projectedVertices, a small piece of
memory right on the chip that only that workgroup’s threads can see (workgroup array).
In the innermost loop, rasterizeTexel is steps 3, 5 and 6 from the list put together, the inside test, the blend and the write:
Those plain weights only work this simply thanks to the sun. Luckily, it behaves like an orthographic camera, so I didn’t have
to deal with perspective correction.
With a normal camera, things further away get squeezed (the far half of a long road takes up much less of the screen than the
near half), so blending by screen area alone would get the middle wrong, and the GPU silently fixes the weights for it. On the
sun’s page nothing gets squeezed, so the plain weights are already exact.
With thousands of threads writing depth at the same time, two of them can land on the same texel, and there’s no telling which
one gets there first. So the write is an atomic min, which the GPU does as one indivisible step, so
no other thread can sneak in between reading the old value and writing the new one, and it keeps whichever is smaller, the one
closer to the sun, no matter who comes first.
Atomics only work on whole numbers though, so the depth gets scaled up to a 24 bit integer first, that’s the DEPTH_SCALE in the
code. 24 and not 32, since that’s as far as a float can turn a whole number back into a depth without rounding it.
And that’s it.
Once every entry is drawn, each texel holds whatever is closest to the sun along its ray, which is exactly what a shadow map is.
What the raster stored, darker is closer to the sun
The dark band at the back is the shadow of a tree off-screen, and it’s darker because its canopy sits much higher than the statue.
The camera can’t see that tree, but the sun can, and only the sun’s view matters here.
Switching to compute was a conscious decision. After all the problems I ran into with the render pass, fixing them one by one as
they showed up, I took it as a chance to think the design through properly.
I wanted it to cover every kind of caster, opaque and alpha tested, static and moving, single meshes and BatchedMesh instances,
moved by the CPU or shaped on the GPU, behind one API that’s easy to use and feels familiar to me, since opacityNode and
positionNode work exactly like they do in a material.
There’s one pass less now, it all runs in the same compute call as the rest of the shadow work, and it even came out faster, mostly
on those slow frames. Only the casters positioned on the GPU got heavier, like in the stress test, but with just the flag doing
that in Revo, I don’t see it becoming a problem…ever.
Out of all those kinds of casters, the moving ones are the only ones that need something extra.
They live in the dynamic layer from earlier, with its own pool of 64 slots, where nothing stays cached: every frame, each dynamic
page gets wiped and drawn again, with only the moving casters in it.
Before drawing anything, the GPU has to figure out which pages a moving caster is in right now, and it has to do it on its own,
since the cloth of the flag only gets its shape there. That’s what the other three numbers of a page table entry are for, the
same entry from the page pool by the way:
const { x: staticSlotPlusOne, // static pool slot + 1, so 0 can mean no slot y: touchedFrame, // last frame a moving caster covered this page z: dynamicSlot, // dynamic pool slot, only valid while touchedFrame is current w: activeFrame, // last frame the camera needed this page} = pageTable.element(pageKey);
Say it’s frame 1300 and the ball is rolling over page 454. Every frame goes like this:
Every page the camera needs right now gets 1300 as its activeFrame. Page 454 is one of them.
Every cluster of a moving caster takes its rectangle from the second pass, the 2D box around it as the sun sees it, and goes
through the pages it covers. The ones with an activeFrame of 1300 get 1300 as their touchedFrame too, so entry 454 now
says 1300 twice.
Every page with a touchedFrame of 1300 gets a dynamicSlot, finer levels first, just like in the static pool. If the 64
slots run out, the coarse pages go without.
The rest goes just like in the static pool, the pages get wiped, the list gets built and the raster draws them, only with the
moving casters.
Frame numbers instead of a simple yes or no mean there’s nothing to clean up afterwards. A yes would have to be turned back into a
no at some point, in an entry for every page that could exist. A frame number only counts while it’s the current one, so when the
ball rolls away from 454, or 454 leaves the screen, its numbers just stop matching on the next frame, and only the pages the
camera needs ever get written.
That redraw is also what makes them expensive. A static page gets drawn once, while a dynamic one gets all of its 128 × 128
texels drawn again every single frame. The ball only covers a handful of pages, but the flag covers about 20, and that alone costs
around 0.2 to 0.3 ms. A long static shadow is nearly free, a big moving one could get freaking expensive.
Receiving the shadow
Casting was the hard part. Receiving is much simpler, and the whole idea is to remove sunlight rather than add darkness.
The scene pass writes, for every pixel, how much light the sun alone gave it, and the last pass takes that much away wherever
the shadow says so.
I write that extra value in the same draw, without a second pass, since it’s just the sun only color from the four MRT outputs
earlier. Every node material in Three has an mrtNode property where it can list custom outputs of its own, which get merged
into the outputs of the pass it’s drawn in.
I added two: directSun, the light the sun alone gives, and softShadow, a knob that lets a surface ask for
softer shadows than its distance alone would give it.
The scene pass declares both with a default of zero, so a material that doesn’t write them simply has no sun to lose and no extra
softness.
Both are defined per material: I extended Three’s MeshLambertNodeMaterial and MeshStandardNodeMaterial, and almost all of it
is Three’s own. Three’s lighting model keeps a running total of the light reaching every pixel, in separate buckets for direct
light, the kind coming straight from a light like the sun, and indirect light, like the ambient one, and adds every light into
them one after the other. All I do is look at the direct buckets right before and right after the sun gets added, and whatever
increased in between is the sun’s share:
class DirectSunPhongLightingModel extends PhongLightingModel { readonly directSun = vec3().toVar("directSun"); // three.js's own lambert material is the phong model with specular off constructor() { super(false); } // three.js calls this once per direct light while it builds the shader direct(lightData: DirectLight, builder: LightingBuilder) { const { lightNode, reflectedLight } = lightData; const isSun = lightNode.light instanceof DirectionalLight; if (!isSun) { super.direct(lightData, builder); return; } // light values before the sun gets added const diffuseBefore = vec3(reflectedLight.directDiffuse).toVar(); const specularBefore = vec3(reflectedLight.directSpecular).toVar(); // let three.js add the sun as usual super.direct(lightData, builder); // the delta is the sun's share const diffuseGain = vec3(reflectedLight.directDiffuse).sub(diffuseBefore); const specularGain = vec3(reflectedLight.directSpecular).sub( specularBefore, ); this.directSun.addAssign(diffuseGain.add(specularGain)); }}
And then there’s the material. For the two lit material types I use, Lambert and Standard, I made an extended version that does
nothing but swap Three’s default lighting model for mine, in setupLightingModel, and list the two outputs right there:
class VSMReceiverLambertMaterial extends MeshLambertNodeMaterial { setupLightingModel() { const lightingModel = new DirectSunPhongLightingModel(); this.mrtNode = mrt({ directSun: vec4(lightingModel.directSun, 1), // how much softer a surface wants its shadow, 0 by default, higher reads coarser pages softShadow: vec4(this.softShadowNode), }); return lightingModel; }}
The terrain, the pines, the player and the flag extend this one, while the statue, the sword, the axe and the campfire extend its
Standard twin, which does the exact same thing for Three’s physically based lighting.
It also means that, unlike casters, receivers have nothing to register: using one of the two materials, or extending it, is all it
takes.
The grass and the flowers are the exception, since their materials don’t take Three’s lights. The grass gets lit by my own
shading, a few cheap tricks, so it works out its sun share along the way. The flowers aren’t lit at all, so they simply hand over
the part of their color the sun would make up, the sun’s light against the sky’s. Both write it straight into directSun.
In the last pass, every pixel finds its page the same way the requests did and reads the static depth, plus the dynamic one if the
page has any moving shadow. The two results get multiplied, so being in either shadow is enough, and what’s left decides how much
of the sun-only color gets taken away.
As for softShadow, the higher a value set by the material, the coarser the pages it reads, and coarser pages mean a blurrier
shadow. The grass, the flowers and the pine canopy all use it, since they look much nicer that way and it also helps mitigate
aliasing.
Everything else gets the PCSS from the first chapter, sharp right next to the caster and softer further away. The only twist with
pages is that a sample can land on the next one, and then it simply reads that page instead, which is why the requests grab every
page within 3 texels of a point.
My first version of the filter cost around 1.25 ms on its own. Two small changes got it down to about 0.33: looking up the page
under the point once and sharing it with all 8 samples, and only reading the dynamic pool where a page actually has moving shadows.
The bias from the first chapter is still there too. Each receiver forgives 3 texels of its own level, a bit more on slopes, so it
grows with the texels, just like with cascades. A caster can also push itself further from the sun with its own depthBias, in
meters.
Comparison is the thief of joy
Looking back at this whole thing, most of my setup follows what Unreal does: the clipmaps, pages cached between frames, moving
things kept apart from the still ones, and a moving sun throwing the whole cache away.
There is also some divergence, sometimes because WebGPU didn’t have what I needed, like with drawing the pages in compute,
and other times it was simply complexity I didn’t need or want to introduce.
Moving foliage is one of the smaller ones. In Unreal, a material that moves its vertices on the GPU, like foliage in the wind,
invalidates its cached pages every frame. Here it’s just a dynamic caster, like the flag, and the static cache never notices.
The soft edges went their own way too. Instead of filtering them, Unreal shoots a few rays toward the light from every point
visible on screen, eight on its highest shadow settings.
It might sound like ray tracing, and in a way it is, just a tiny piece of it. A path tracer shoots rays from the camera through
every pixel and lets them bounce around the scene, picking up light and color along the way, and at each bounce it also fires one
ray straight at the light to check whether anything is in the way. Unreal keeps only that last one: no bounces, no color, just “can
I reach the sun from here?”, starting from the point the camera already found.
It never touches the actual geometry either. Instead, a few points along each ray get checked against the pages, and how many of
the rays end up blocked is what softens the edge. Hence the name, SMRT (Shadow Map Ray Tracing).
Out of curiosity I did try a quick version of the rays, and the shadows came out slightly sharper, but honestly, to me the
filtered ones looked a bit better, and the rays cost a little more too. Not by much, but enough for me to drop that small detour
and stay with the PCSS from the first chapter.
On the complexity front, Unreal does A LOT, and most of it is far from trivial. Very fascinating if you ask me, but bringing it
into Revo would mostly mean more things to dig into, understand and eventually maintain.
Unreal’s virtual shadow maps also cover point and spot lights, each with its own set of pages, while Revo only has the sun. And
Nanite doesn’t stop at clusters: it breaks every mesh into a hierarchy of them at different levels of detail, and swaps them on
the fly depending on the view. Revo just has plain clusters of 64 triangles, and they do the job pretty well I’d say.
I might still get to some of that stuff one day, just for the sake of learning new things because it’s fun, but for now I just
wanted (nice and performant) shadows :)
What it costs
Speaking of performance: on my M2 Pro, moving around the map, a frame takes about 4 to 5 ms, a steady 120 fps, the same as with
the baked shadows. I can’t measure the shadows on their own, but the numbers didn’t move. The last pass runs every frame, while most
of the page work stops as soon as nothing moves, so in practice they added next to nothing, which is pretty sweet :)
Grass is the one thing that doesn’t cast. I did try it, every blade drawn into the dynamic pages and moving with the wind, but it
looked like a field of noisy speckles crawling around with every gust, and it blew way past my budget. I also tried Bend Studio’s
screen space shadows, marching through the depth buffer toward the sun, and they came out as dark smudges that didn’t read as
blade shadows at all. So grass only receives.
The real catch is still the sun: moving it redraws the whole cache, and Epic’s own write-up on shadows in Fortnite says the same,
since the pages themselves land in different places. Revo’s sun doesn’t move unless I move it, so that one was an easy trade to make.
And even trimmed down like this, it’s still a lot of moving parts: requests, slots, tags, generations, clusters and two pools,
all living on the GPU, where a bug mostly shows up as a shadow in the wrong place, or no shadow at all.
Still, I can move things around now without ever thinking about a bake again, which is pretty neat if you ask me :)
Closing thoughts
Of all the articles I’ve published so far, this one was by far the hardest to write, not even close.
Building the shadows was a long journey already, but writing about them turned into a rabbit hole of its own. Every time I went back to
the code to get a recording or a screenshot right, I’d find something else that felt like it had to be mentioned, rewrite a
paragraph, and then start doubting the one before it. At some point I was questioning pretty much every choice in here.
Somewhere along the way I think I may have realised why. Every detail felt important because I remembered what each one had cost
me to figure out.
A sphere casting a cube shaped shadow, a flat plane quietly throwing the whole cache away, chasing a bit of lag on a laptop that
wasn’t even my main one. To me each of those deserved a section of its own, while a reader mostly needs a sentence, sometimes not
even that.
Every one of them was part of the journey, but telling all of them would have turned this into a book with a four hour reading
time, and this was meant to be an article. So some of them made it in, and some got cut.
It gave me a whole new respect for the people who can take something this tangled, explain it in plain words, stay concise where it
matters and know what to leave out.
That’s a skill of its own, and clearly I still have a long way to go :)
Explore more
A few resources that shaped this grimoire, or are worth a read next to it: